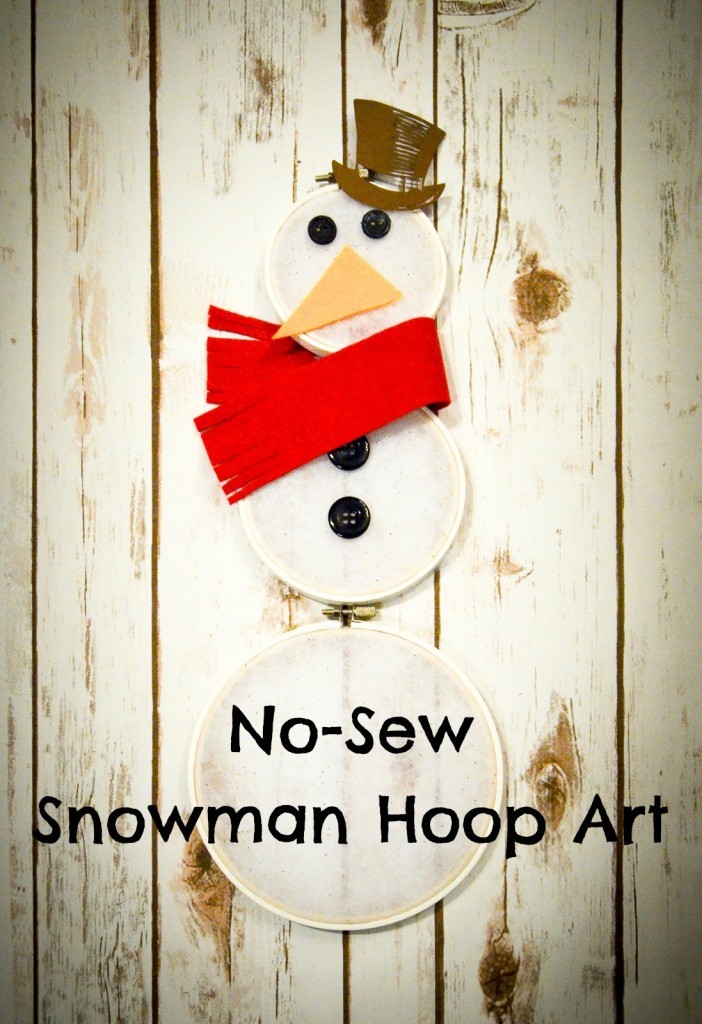
No-Sew Snowman Hoop Art
I always feel a big letdown after Christmas when all of the decorations are put away. I’ve often struggled with finding fun decorations that work well with the winter season without screaming Christmas to everyone. I came up with this No-Sew Snowman Hoop Art as a fun decoration to see me through the season.
Better yet, I’ve joined with some talented bloggers to bring you more fun no-sew winter projects!
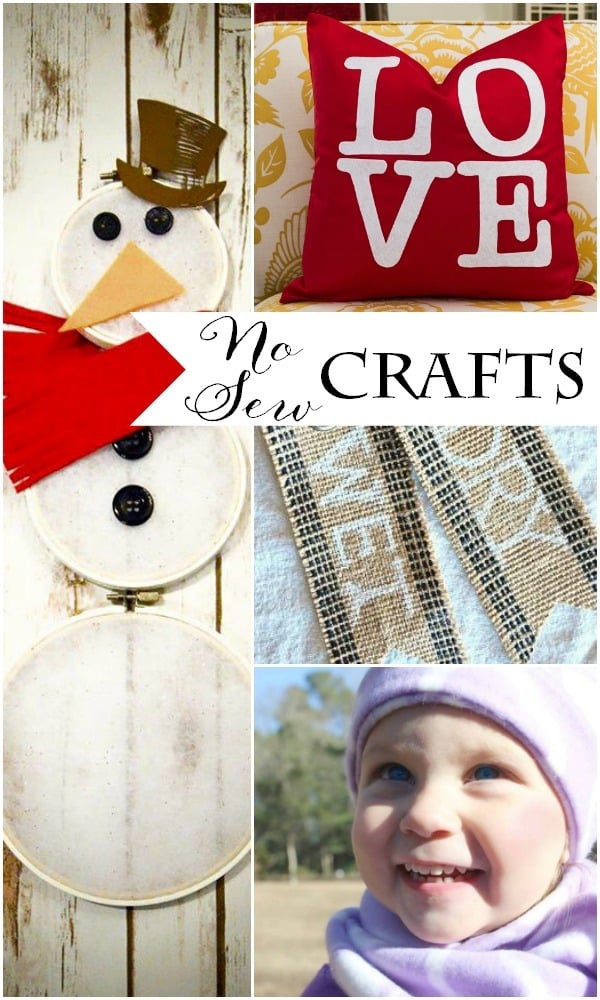
You can check them all out here!

Albion Gould | NO SEW SNOWMAN HOOP ART
On Sutton Place | DIY No Sew Valentine LOVE Pillow Cover
Stone Gable | NO SEW EASY BURLAP TAGS
The Everyday Home | NO SEW WINTER HAT AND SCARF
**This post contains affiliate links. I only share products I use and love.**
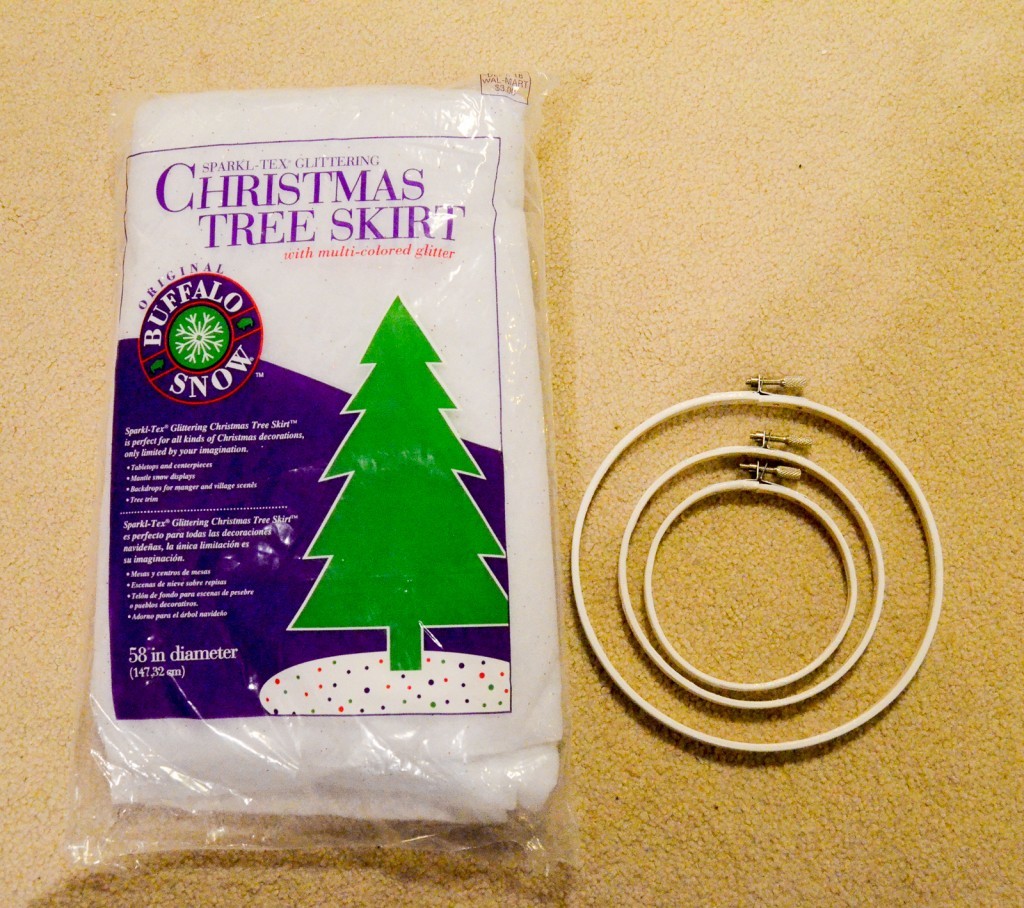
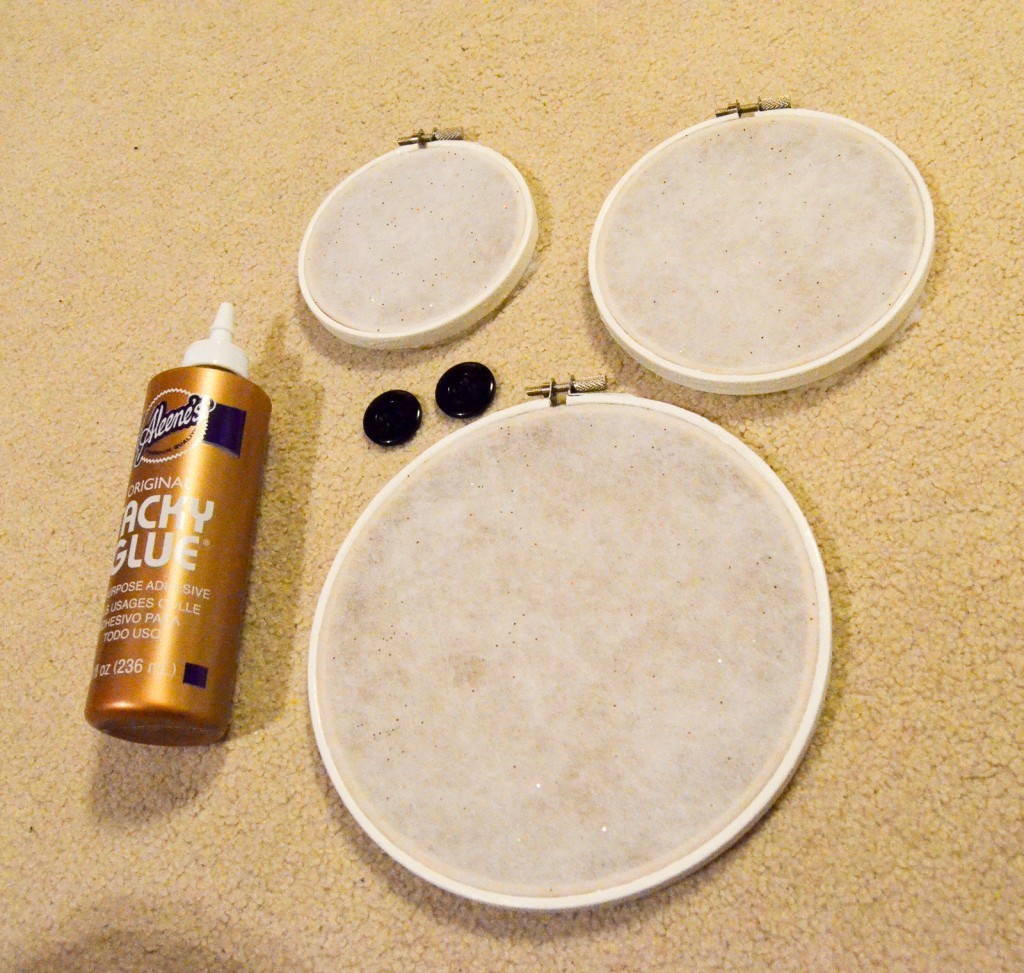
For my No-Sew Snowman Hoop Art, you will need:
- three hoops (different sizes)
- snowy tree skirt (white felt will work fine)
- white craft paint
- sparkle Mod Podge
- white/iridescent glitter
- four black buttons
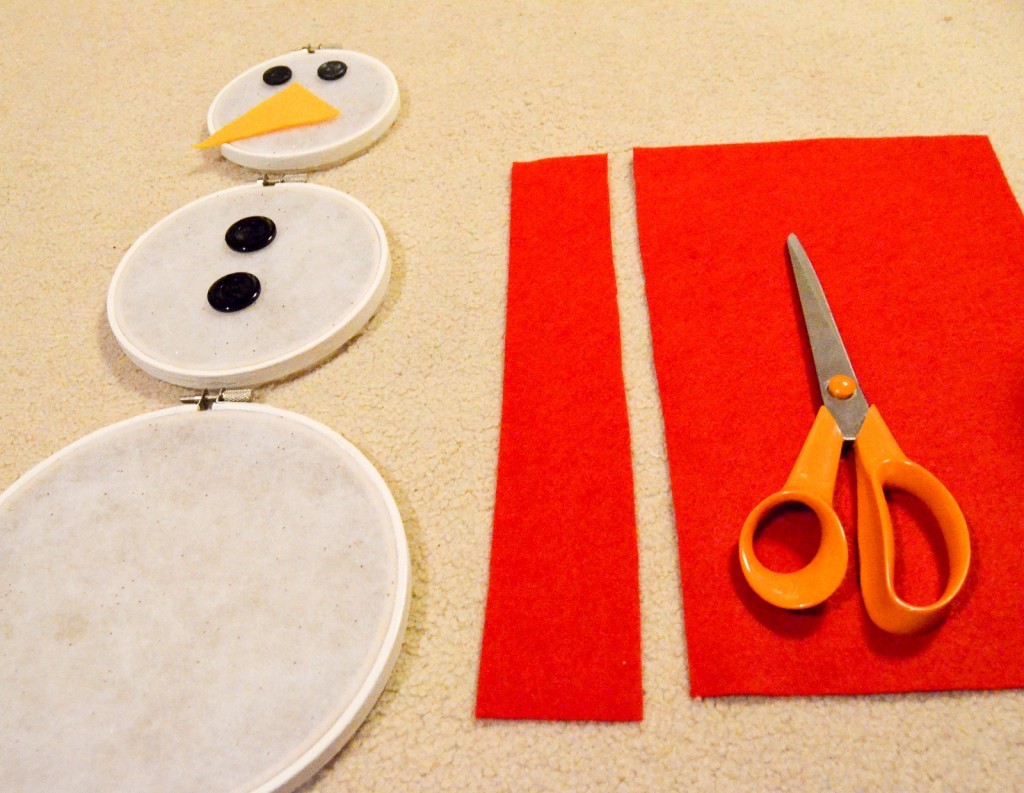
- red felt
- orange felt
- Aleene’s Tacky Glue
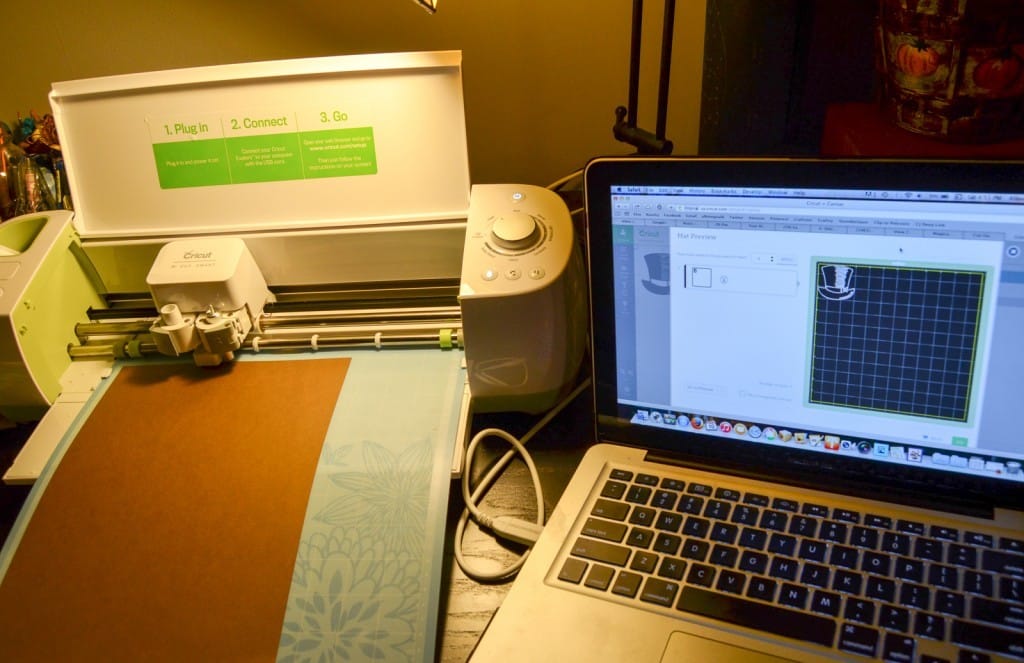
- Cricut Explore (optional)
- brown or black cardstock
- scissors
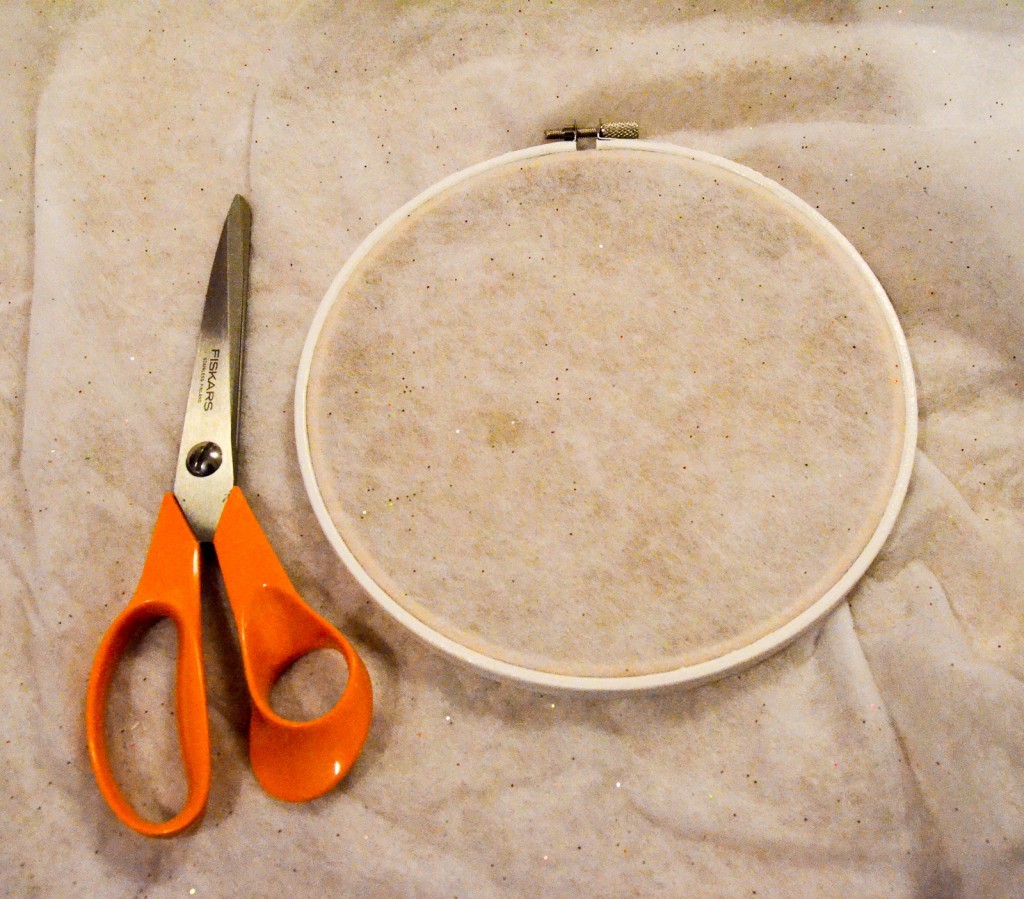
Follow my tutorial for glitter hoops. I used the white craft paint, glitter, and Mod Podge for this. Once your hoops are dry, pull out your snowy tree skirt (I found mine on clearance at Jo-Ann’s–if you don’t have it, white felt is just fine!).
Place the skirt over the inner part of the hoop. Put the outer hoop on top and tighten. Trim the skirt at the back.
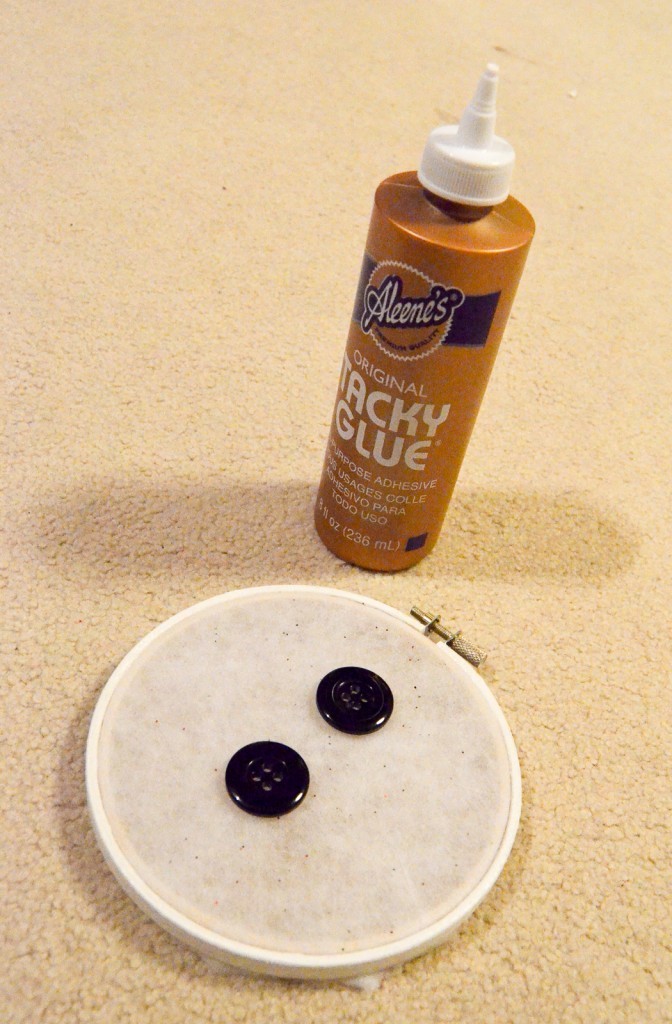
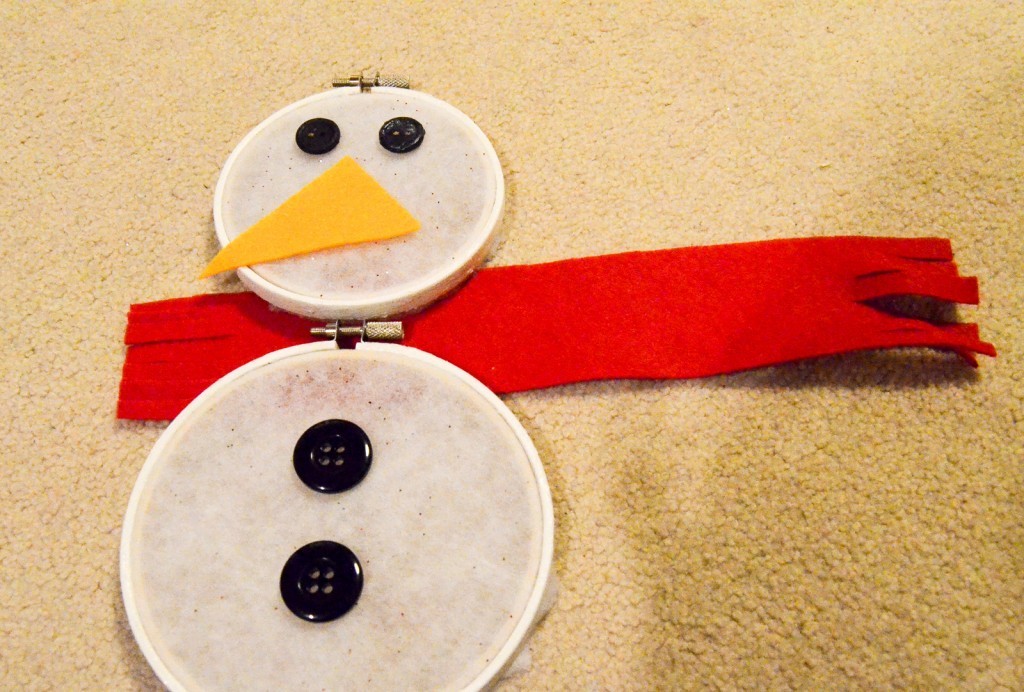
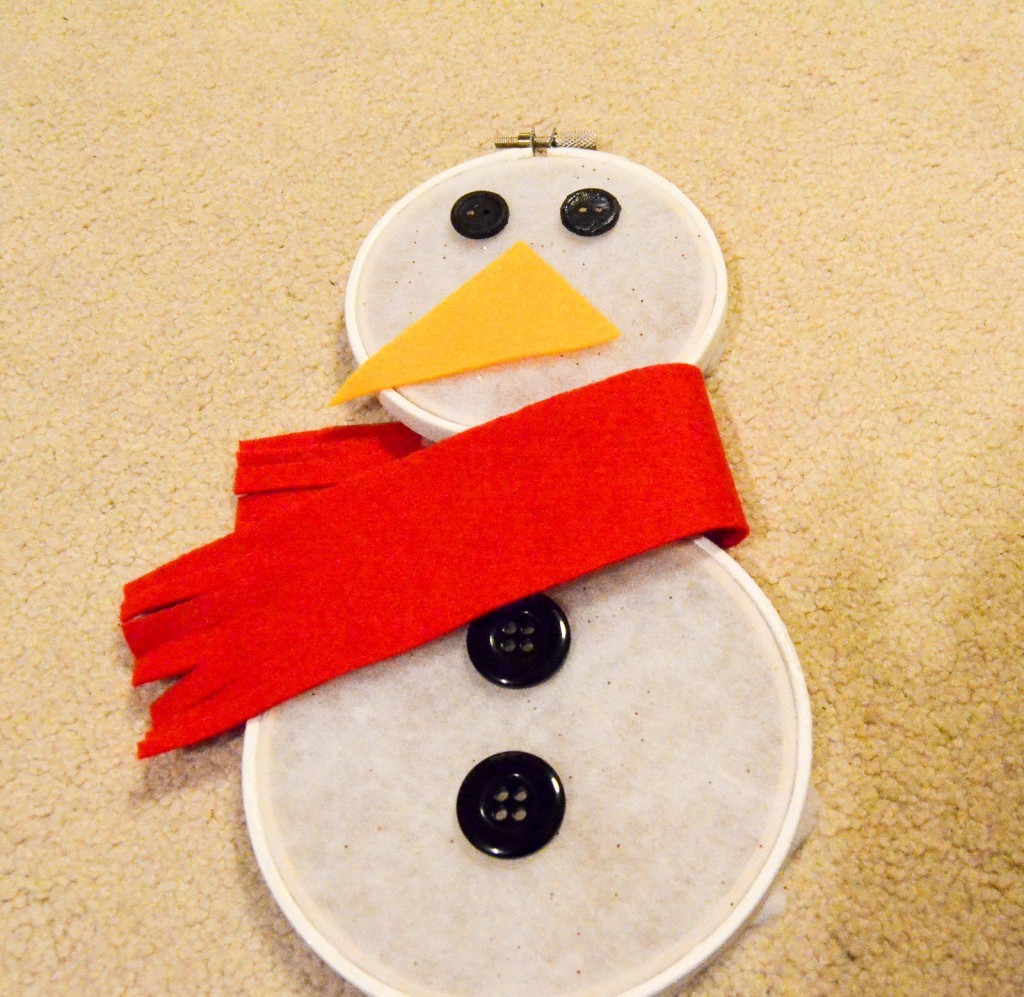
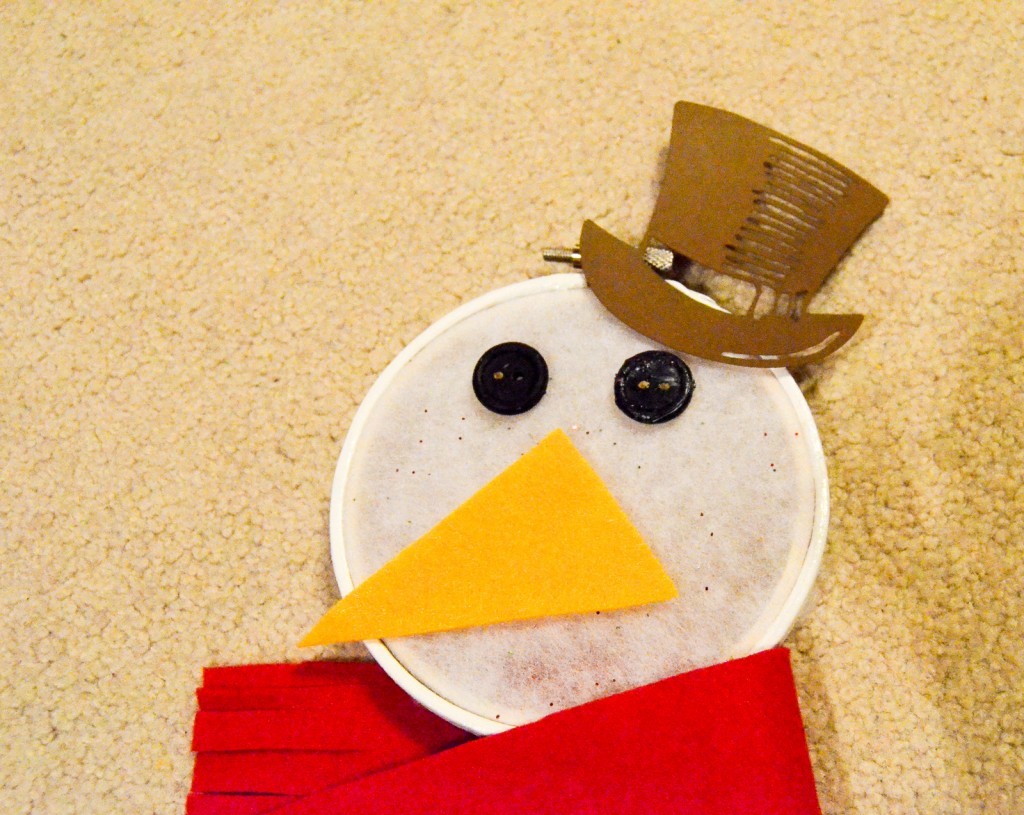
When you have all three hoops prepared, pull out your Aleene’s Tacky Glue and glue two of the buttons onto the medium-sized hoop.
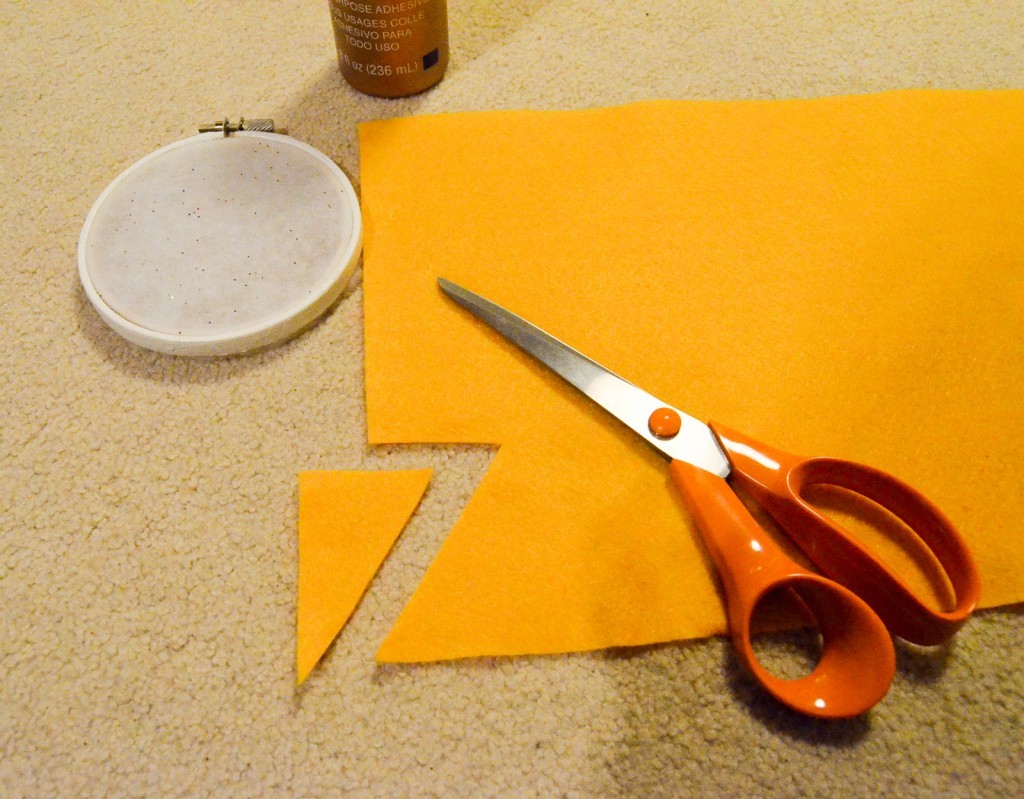
Cut a “carrot” nose out of the orange felt. I did this by cutting freehand from the corner of the felt, as shown in the picture.
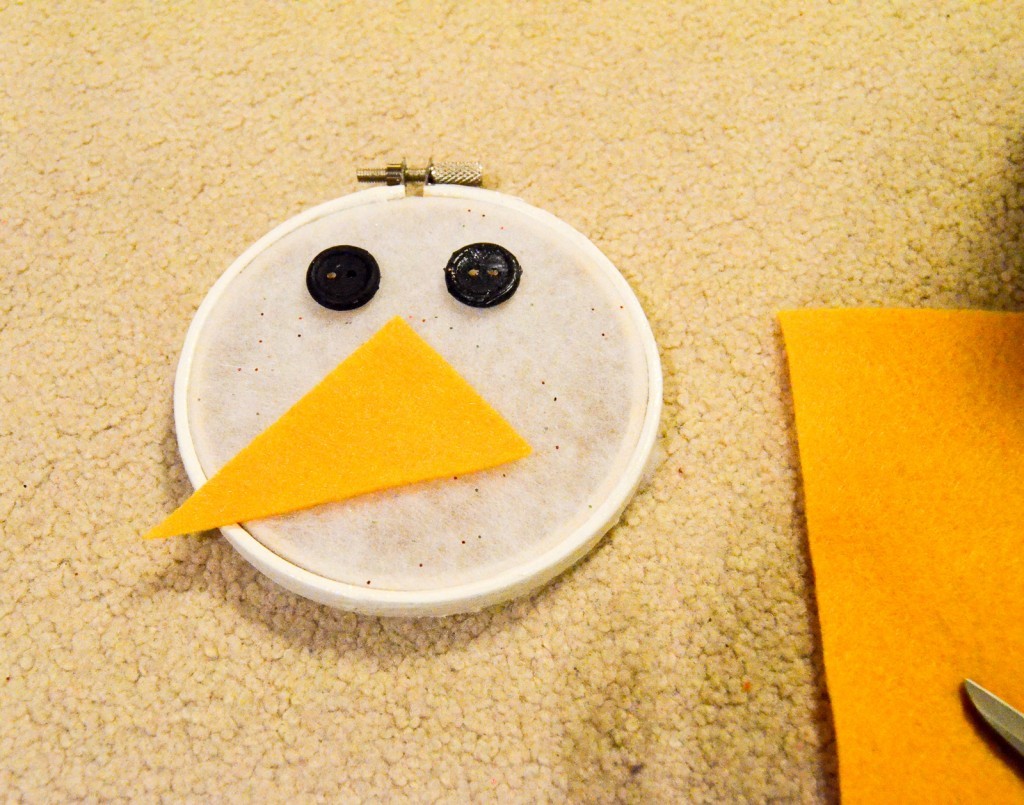
Glue the button eyes and carrot nose onto the smallest hoop. I wanted the nose to be oversized and hanging over the edge of the hoop.
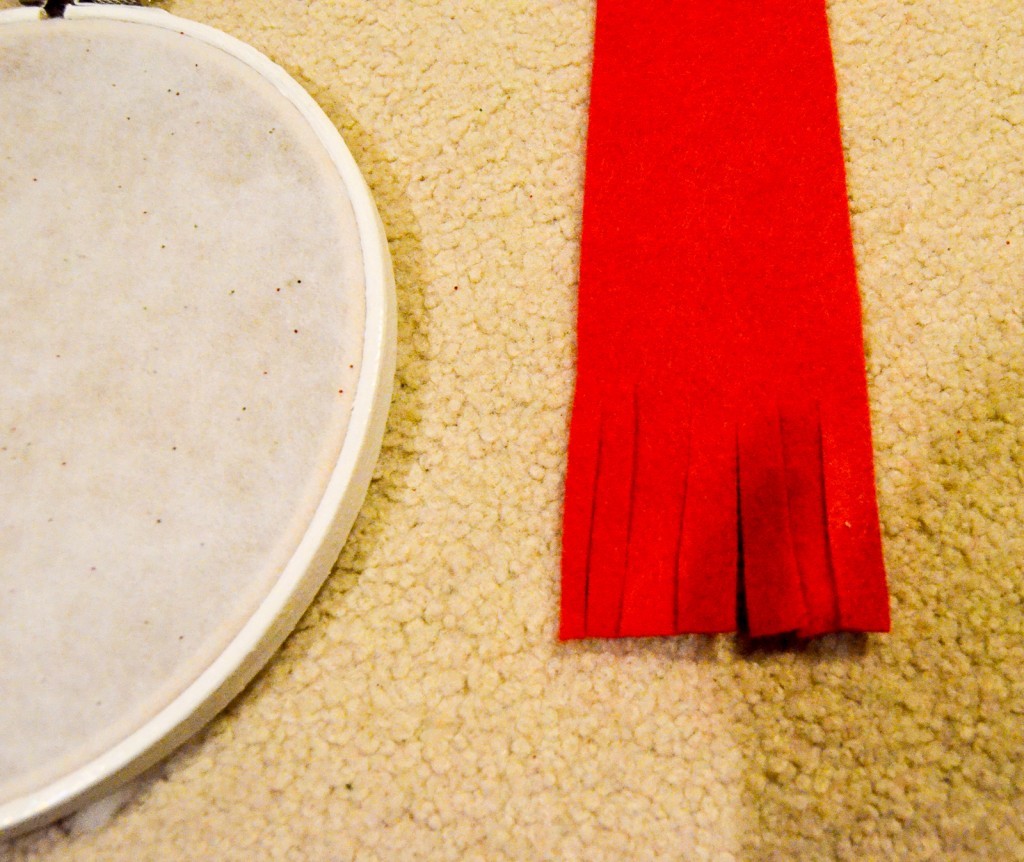
Now it’s time to accessorize! Cut a piece of from your red felt length-wise. Mine is about 1.5″ wide. Take your strip and cut fringe into each end.
Place the scarf behind where the head and torso hoops meet. Glue it against the hoops. Wrap the rest of the scarf around the front and glue it where you want it to lay.
Now, I have a Cricut, so I used that to make a top hat for my snowman. Design Space has many options to choose from. If you don’t have a Cricut, you can cut a top hat from felt or card stock with scissors.
Glue the top hat onto the snowman’s head at a jaunty angle. Yes, jaunty.
You can choose how you want to hang your snowman. You can glue the hoops together and hang it from the top one, or you can hang each hoop individually. I chose to hang mine individually.
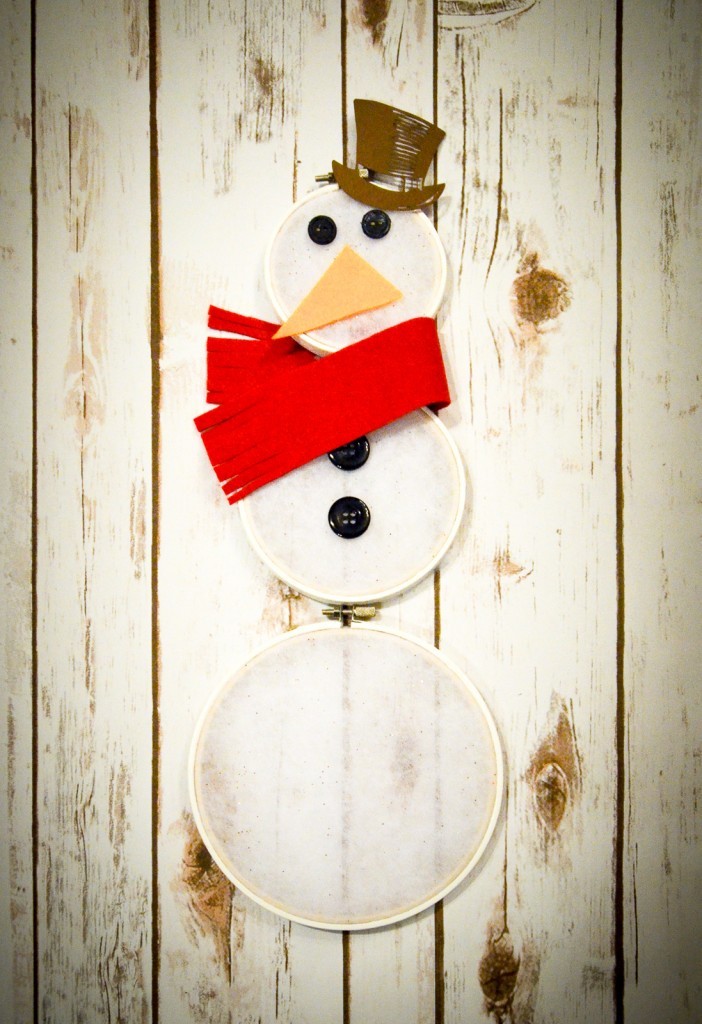
My No-Sew Snowman Hoop Art is currently hanging on the inside of our front door. It’s a cheery decoration to see us through the winter season.


This is absolutely the cutest no-sew snowman I have ever seen. I think it was super clever that you used the glitter tree skirt for texture. So smart. And the large over-sized nose made me smile. Great no-sew project. Thank you so much for being our special guest this month for our No-Sew Winter Showcase. Have a great week! ~ Barb
How adorable!!! Your snowman is the perfect way to chase those after Christmas blues away! And he’s so easy to make!!! Thanks so much for joining our little no-sew group!