Felt Fascinator DIY
I have a fascination with fascinators and when I was given the opportunity to use the new Cricut Explore, I knew immediately that that’s what I wanted to make. (Say fast felt fascinator three times fast!) I’m in the Cricut Design Space STAR! competition and this is my first entry. The category is fashion and my team’s theme is yellow. Before I get into my tutorial, just take a look at the yellow awesomeness of Team 10!

Read through to the end of the post for all their links! Now, let me show you how easy my felt fascinator is!
For this project, you will need:
- three pieces of felt
- interfacing
- iron
- Cricut Explore
- Cricut Explore Deep Cut Blade
- bow design (available on Cricut Design Space)
- donut design (available on Cricut Design Space)
- thread and needle
- headband
**Note** I made this when the Cricut Explore was the only machine. If you’re using a newer machine, like the Cricut Maker, you won’t need to use the interfacing and can use the rotary blade.
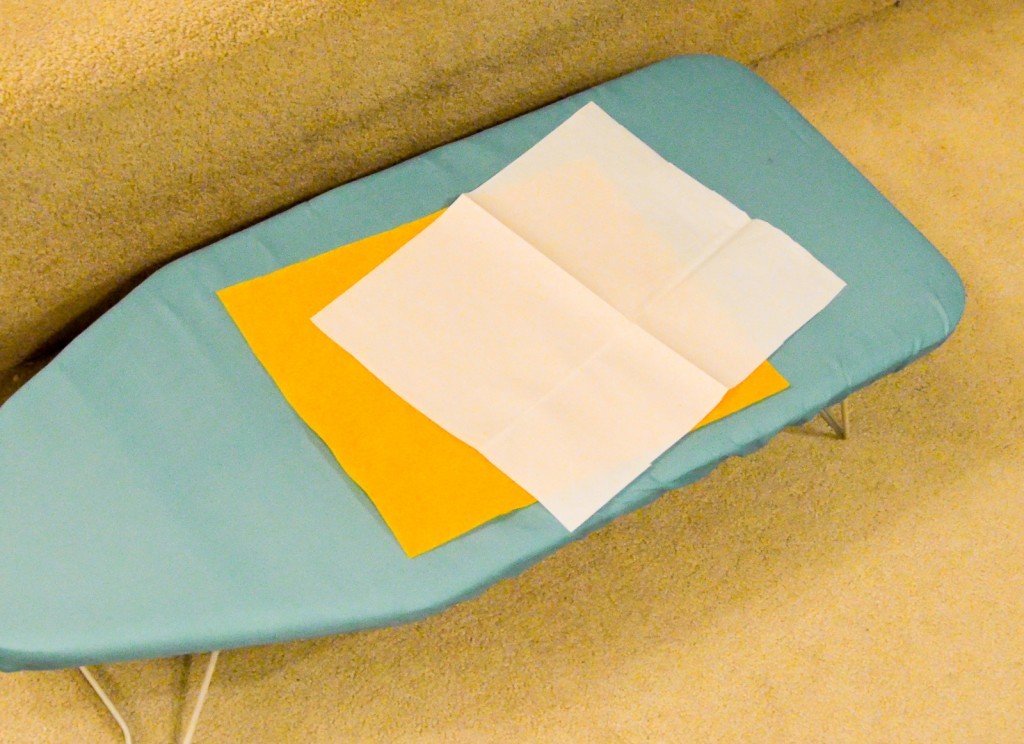
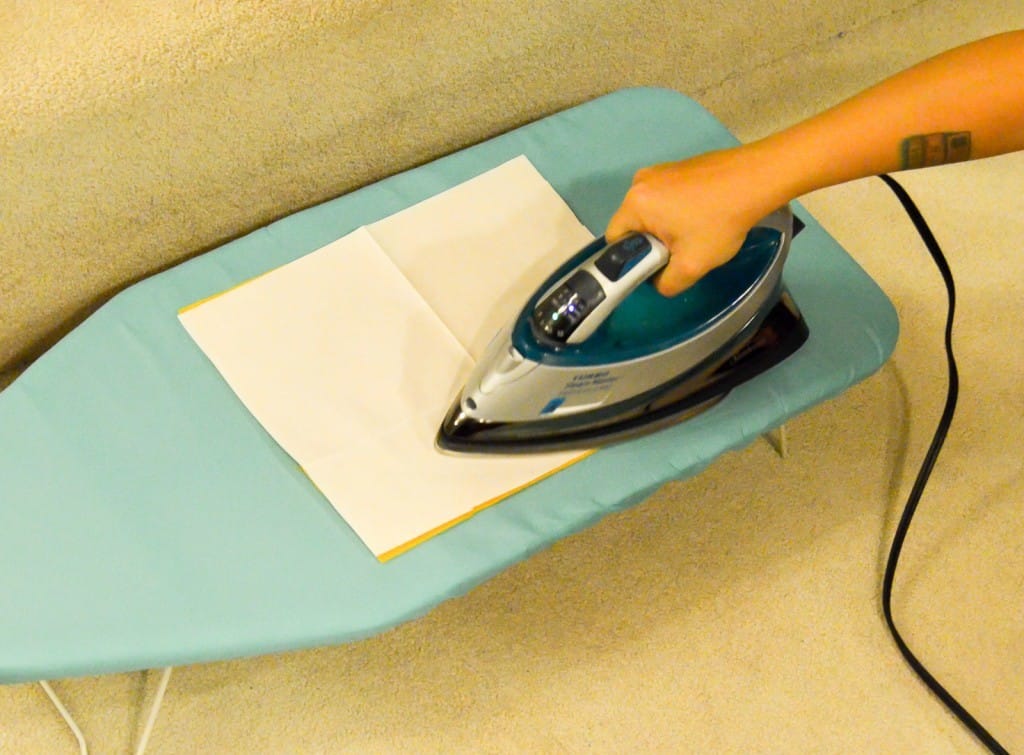
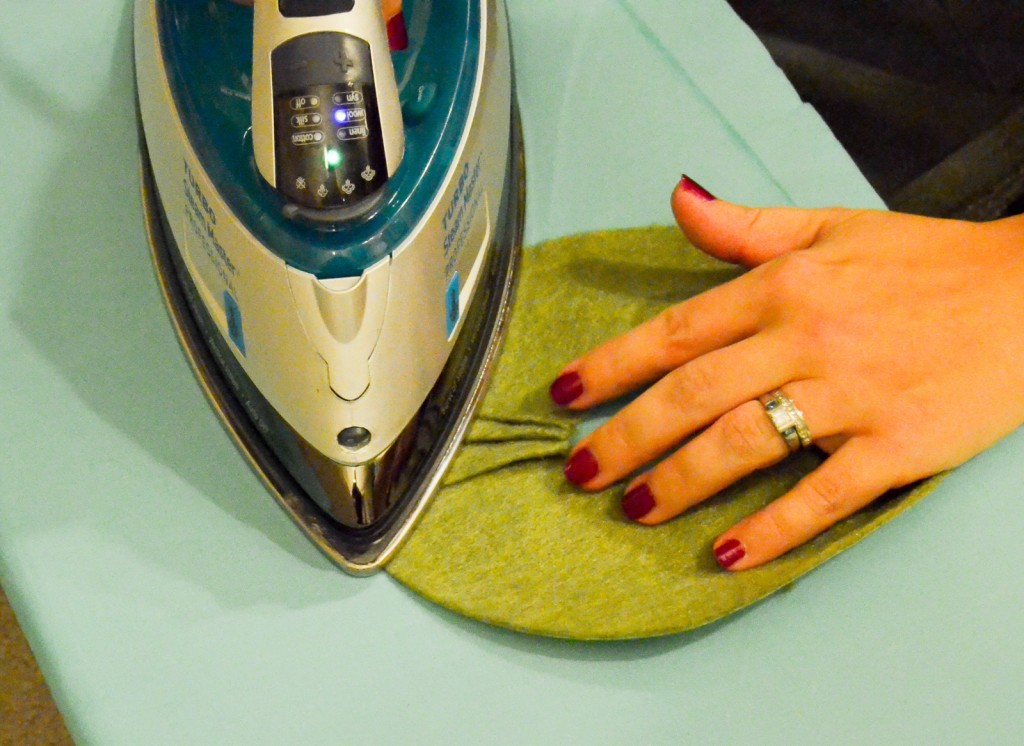
I started by ironing the interfacing onto the felt. Put the rough side of the interfacing onto the felt and iron. Do this for all three pieces.
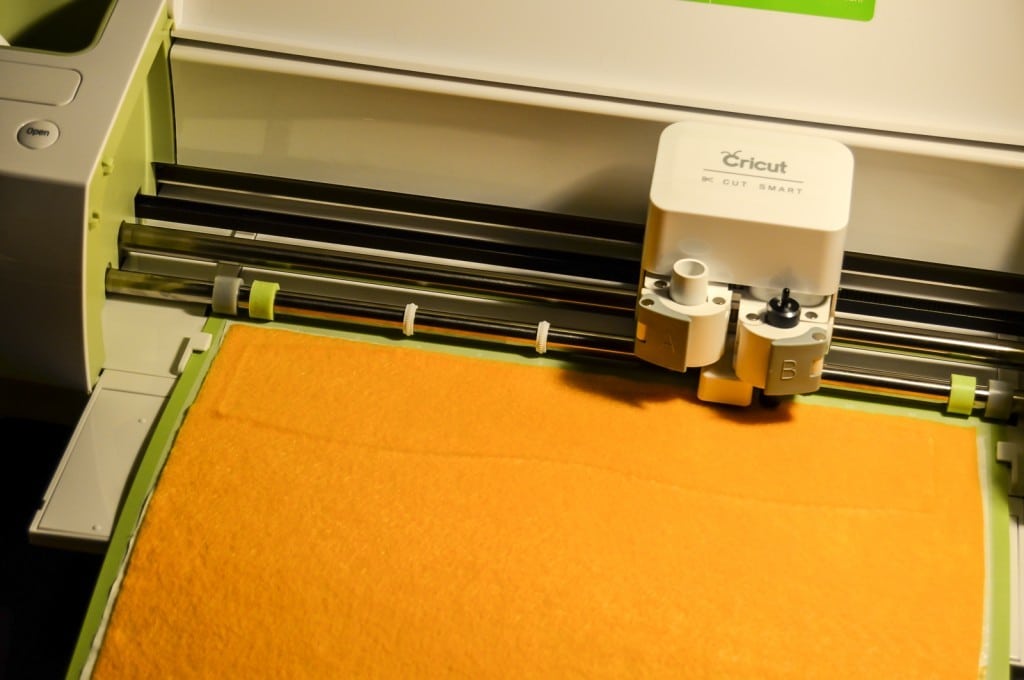
I then pulled up the bow template in Cricut Design Space and watched the machine smoothly cut out the shapes. I cut out bows on two of the pieces of felt.
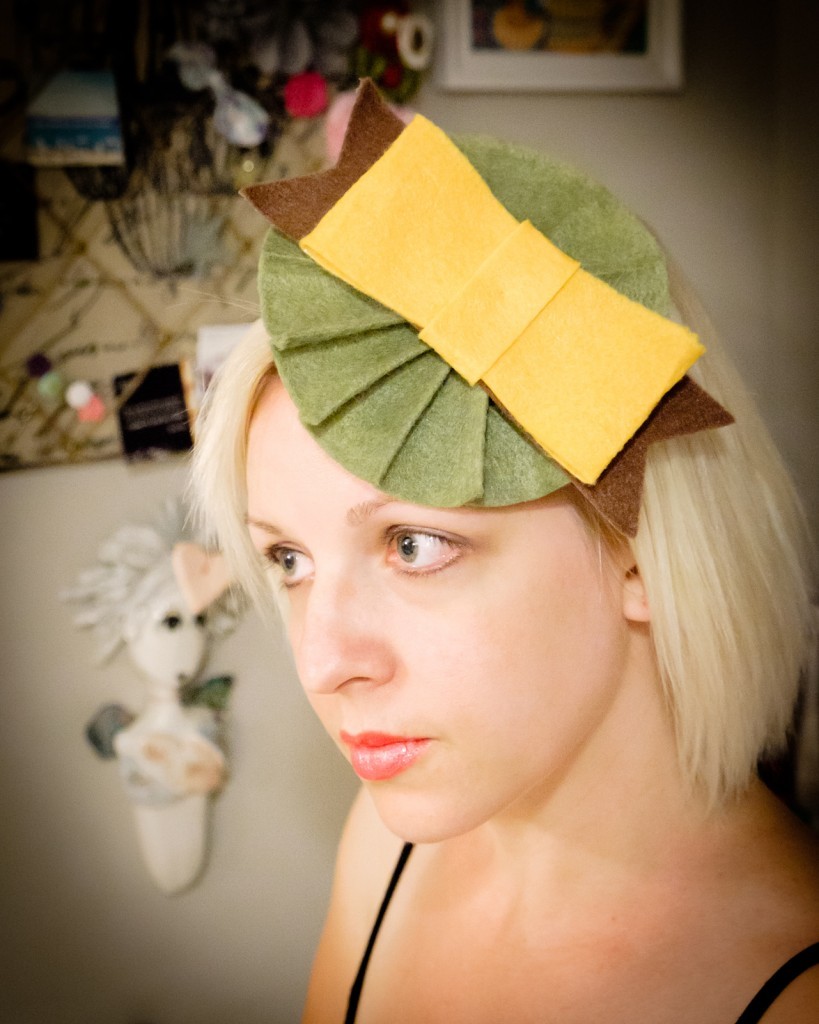
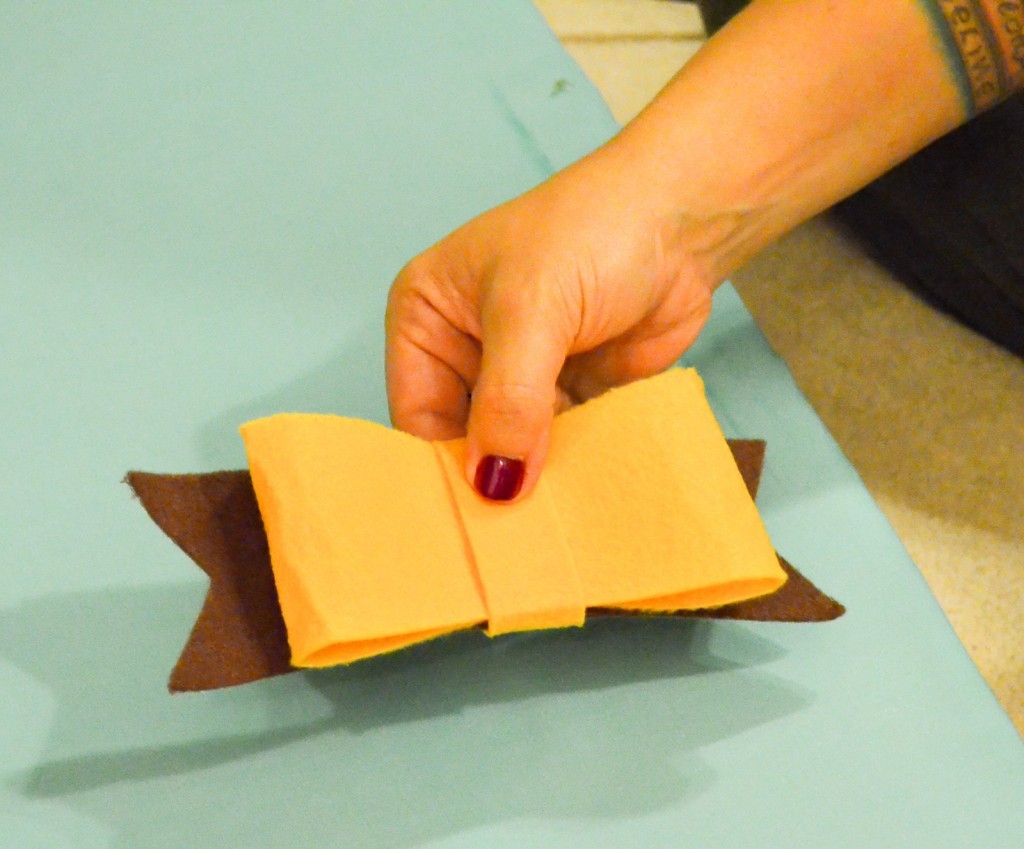
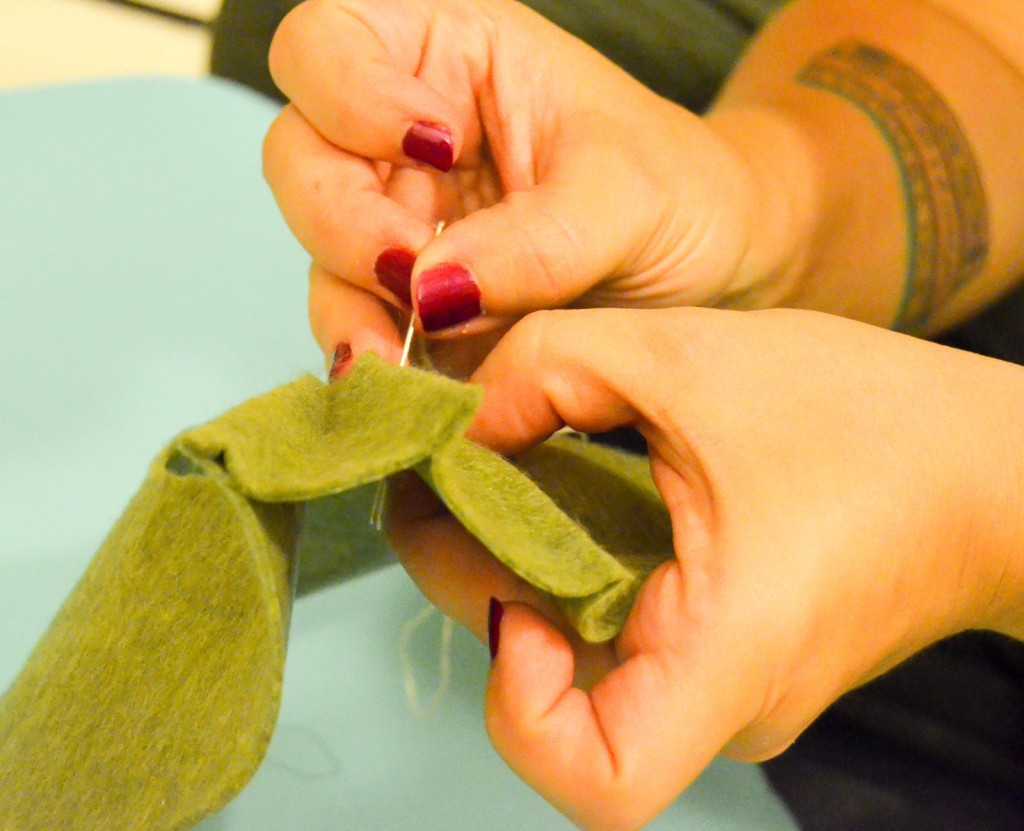
The pieces are easy to pull off of the mat and interfacing. You’ll be left with pieces to make two bows. I used a combination of colors for the bows. I only used one for this fascinator, but will use the other bow soon. I put the pieces together and put a small stitch in the middle to hold it together.
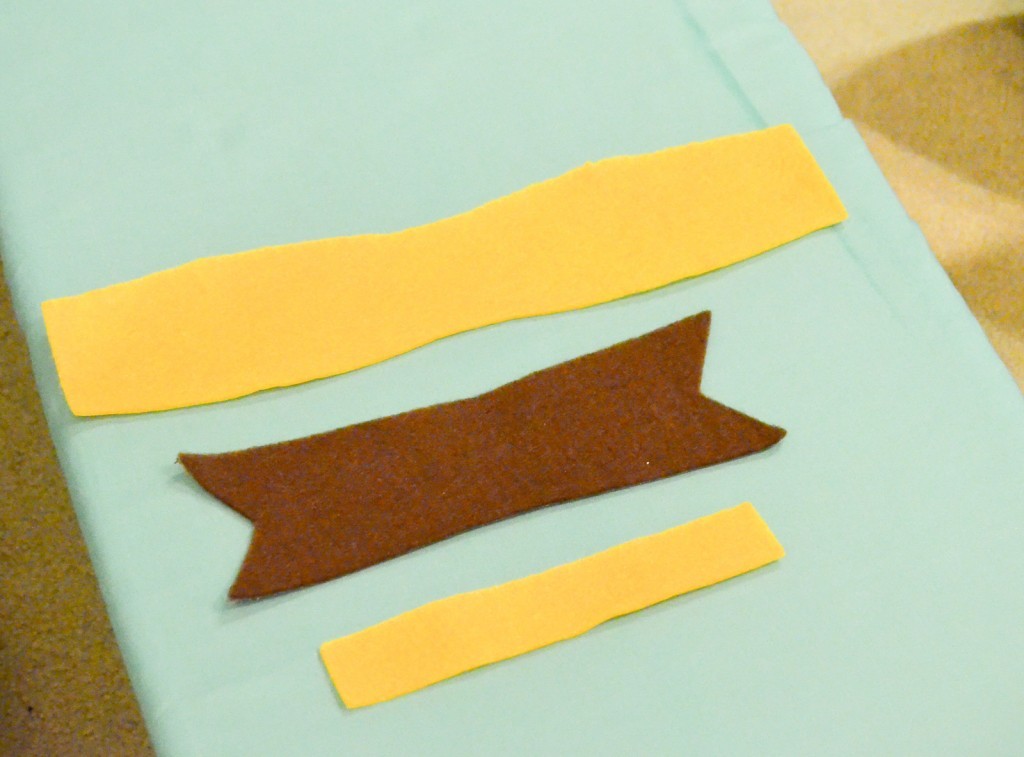
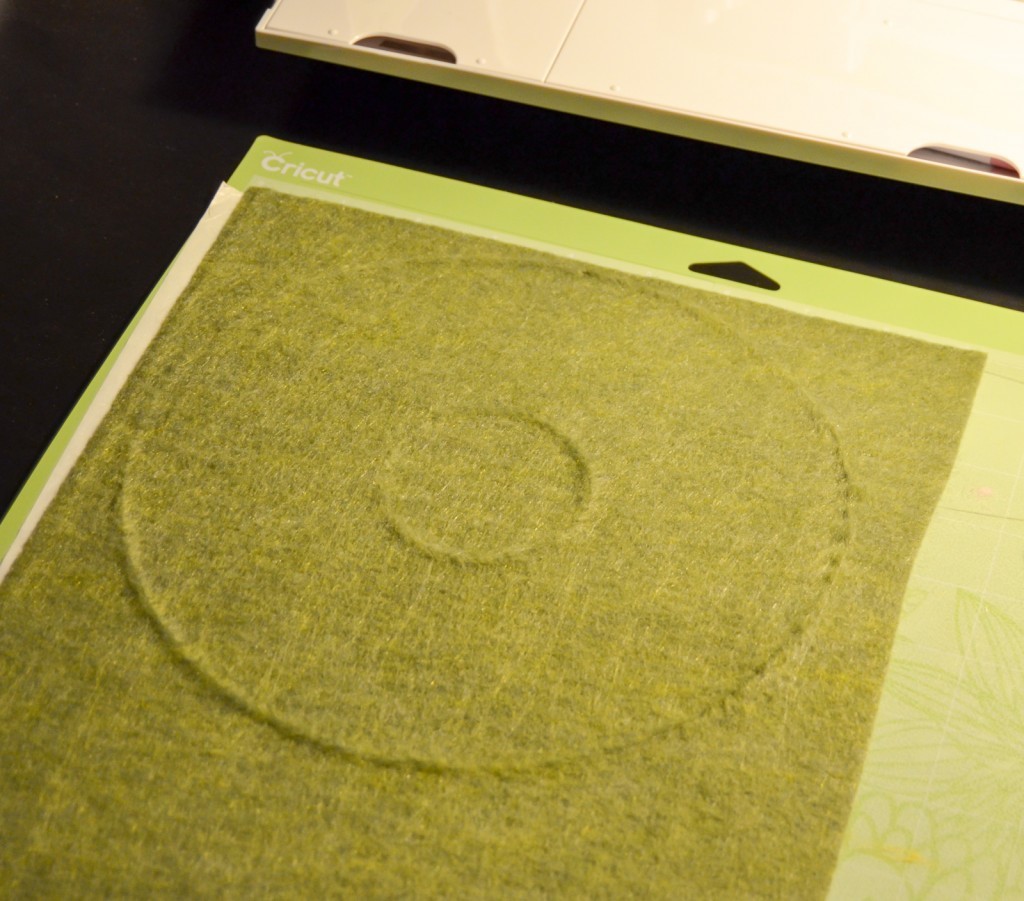
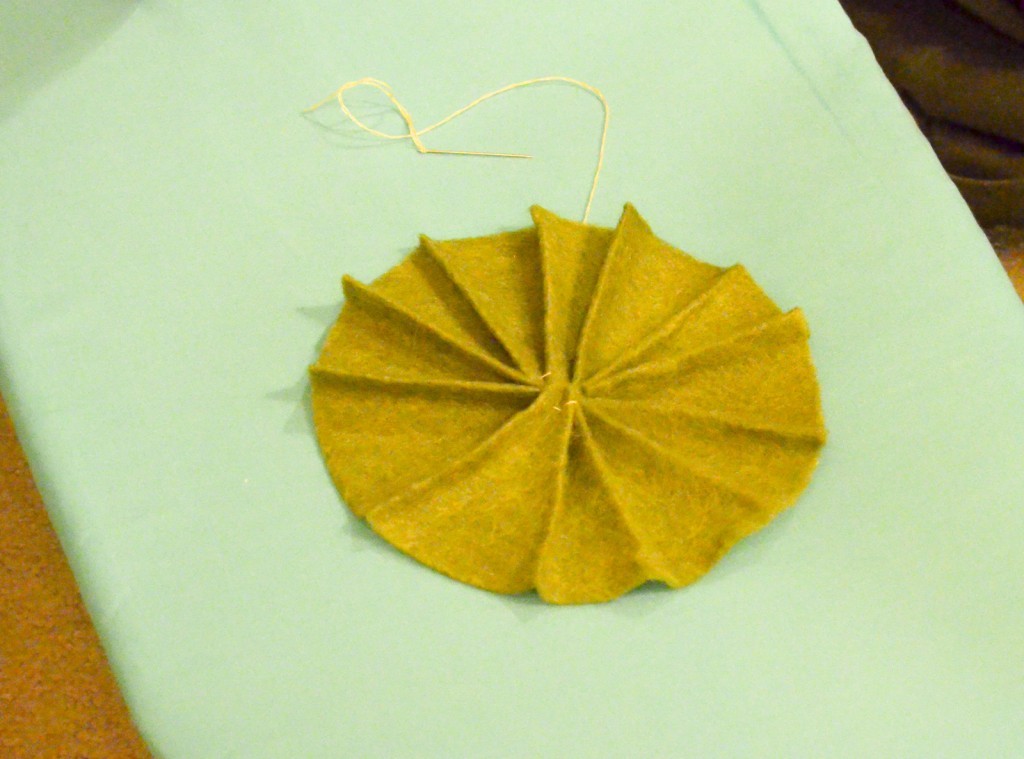
I then pulled up the donut shape in Design Space and cut out the last piece of felt.
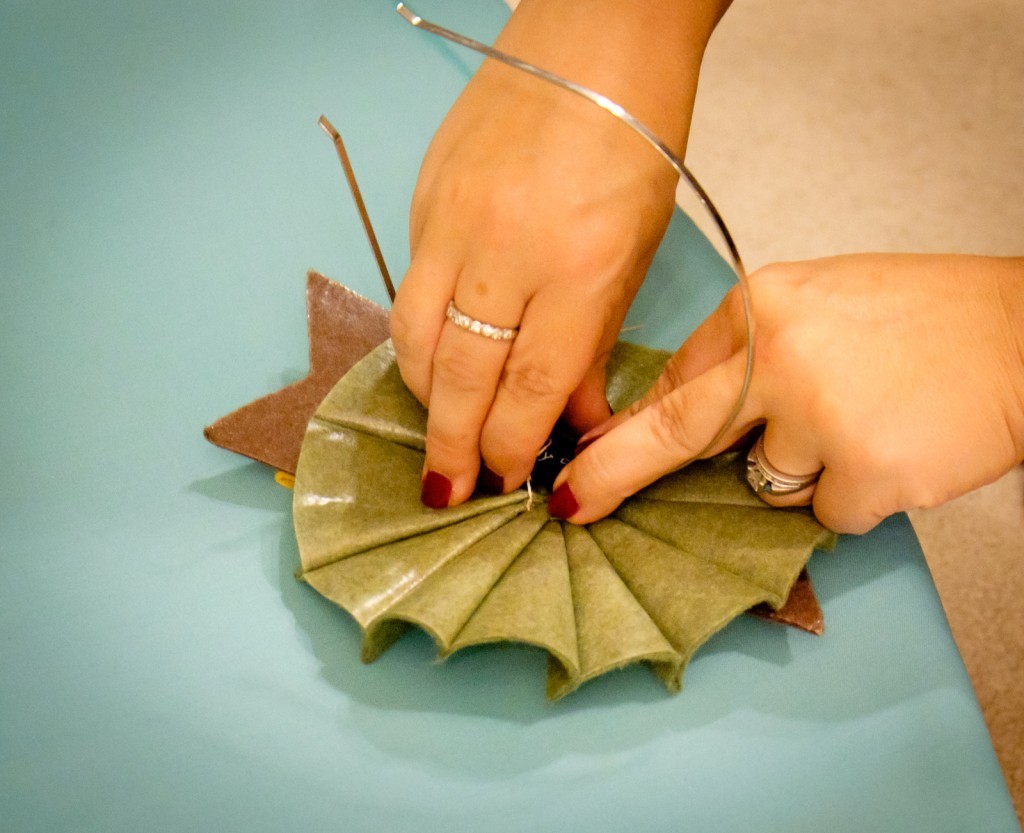
I used the “donut” piece. Start pleating your way around by folding from the middle out with the interfacing side of the felt on the bottom. I did a combination of ironing the pleats down and stitching them together in the middle.
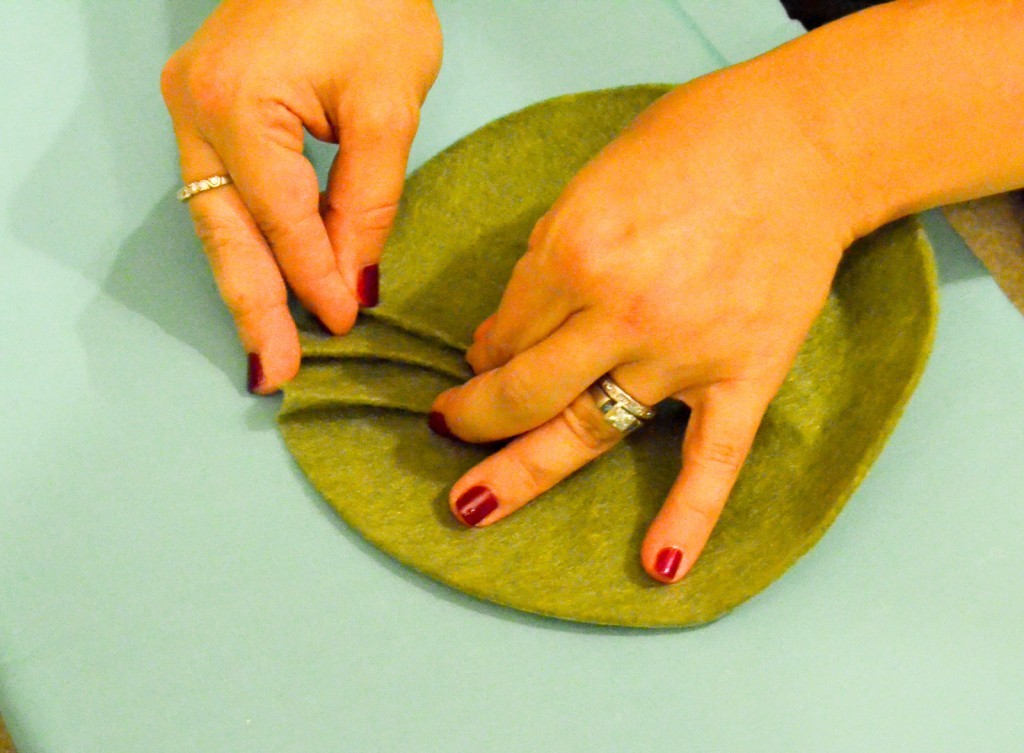
You’ll end up with something like this:
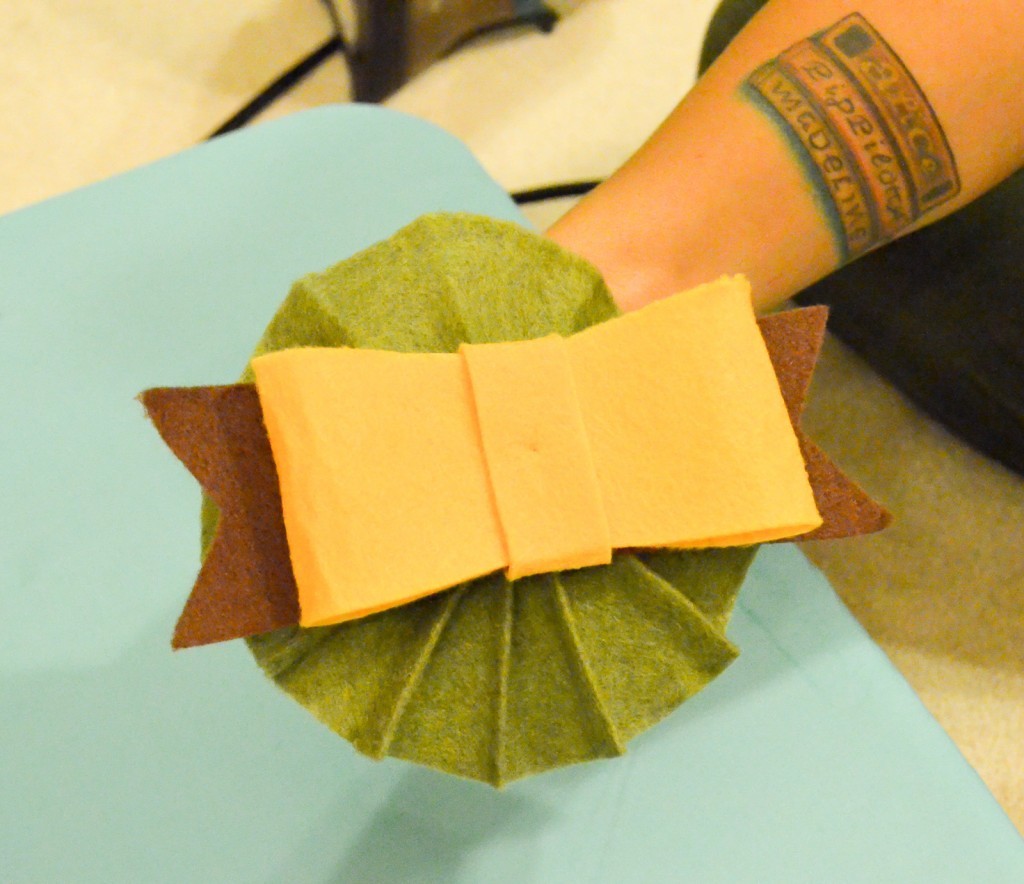
Finally, it’s time to attach the bow to the fascinator base. I did this with a few stitches once I had it positioned how I wanted.
The final step is to attach the fascinator to the headband. Again, I just stitched the felt fascinator to the headband.
I’m all sorts of in love with how my felt fascinator turned out and can’t get over how easy it was with my Cricut Explore. I can see many more felt fascinators in my future!
Now that I’ve shared my felt fascinator with you, I’d love for you to visit my teammates!

Check them all out and show them some love!
**I received my Cricut Explore as part of the Cricut Design Space Star competition. **


Darling, you look MARVELOUS!! 🙂 You have the perfect look to pull this off. Love it!
Your instructions make it look so easy,. And it came out so cool!
Steph @ Crafting in the Rain recently posted…Fabric Covered Foam Head
OOOOOH I love how that turned out! And lucky you to get the Explore, so fun!
Kaysi @ Keeping it Simple recently posted…5 Tips To Stay Healthy and Meet Your Health Goals #BalanceRewards #CollectiveBias
I love that you did this!
Dee @CupcakesandCrowbars recently posted…Awesome Things Tuesday – 40
I totally love this! I want to make one in every color!
Heidi @ Happiness is Homemade recently posted…Printable Healthy Eating Chart & Coloring Pages
What interfacing did you iron onto your felt? I haven’t had a successful cut. Please share what you used. Thanks! Fabulous headband BTW!!
Honestly, I just used whatever was on sale! I ironed on the interfacing and probably spent too much time on it, and then I flipped it over and ironed the felt side, too. I have no idea if that made any difference, but It was pretty flat instead of fluffy, if that makes sense.