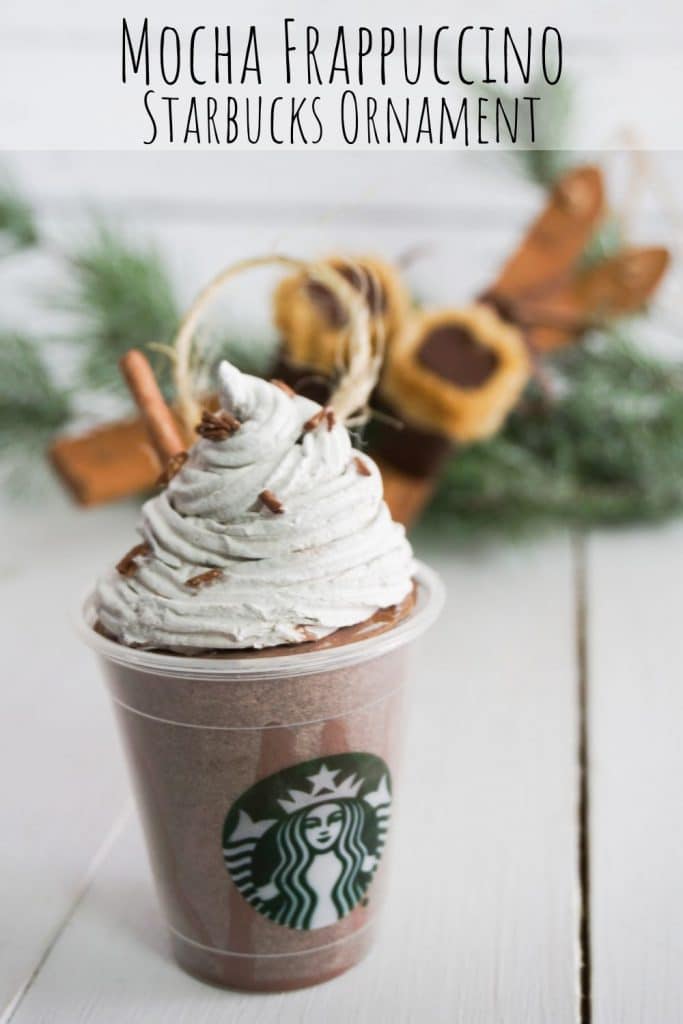
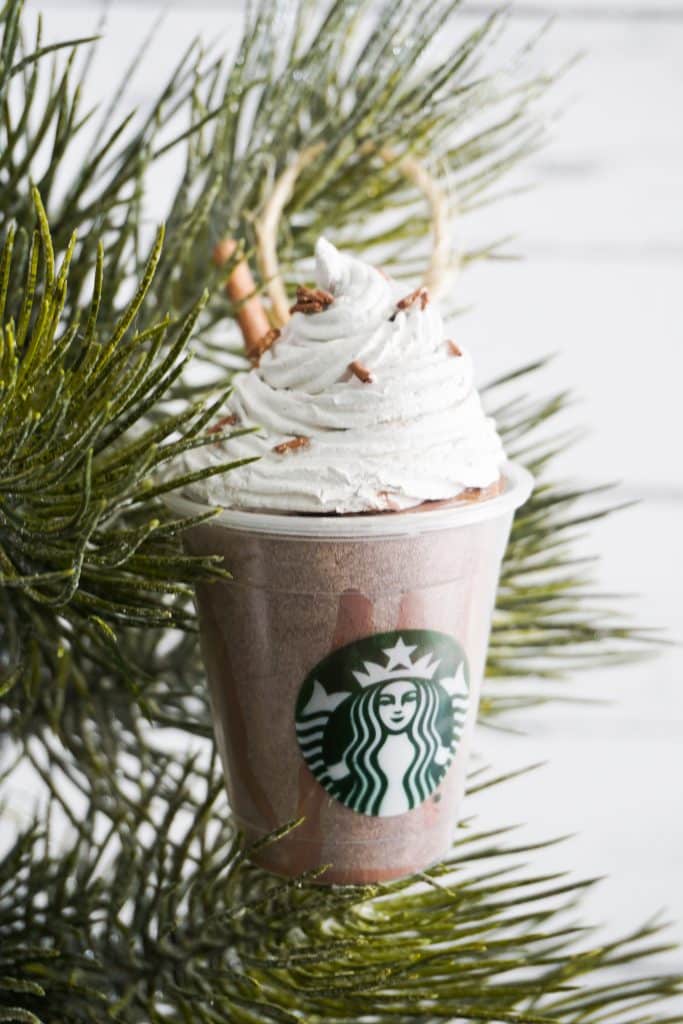
Mocha Frappuccino Ornament
My girls are obsessed with Starbucks, to the point that wherever we are in the world, they will squeal with delight when they see that sign. If I need to bribe or reward them, I offer up going to Starbucks. At least one of them always orders a mocha frappuccino. I know that many of you will point out that going to a local coffee shop should take priority, but Starbucks is synonymous with comfort for us–we’ve moved so much and my kids have now lived in three countries. Starbucks has been consistent for them wherever we are. This mocha frappuccino ornament is a fun addition not only to our tree, but now the girls each want one to keep on display in their rooms.
This post contains affiliate links.
Supplies:
- Sample Cup from Starbucks (just ask, they’ll give you one if they have it)
- Small Portion Brown Foam Sheet
- Brown Craft Paint
- White Craft Paint
- Air-Dry Clay
- Twine
- Small Amount of Cardboard (thin-ish cardboard, like a shoebox or thick cardstock)
- template download
**If you can’t get an official Starbucks cup, a clear cup will work just fine–it just won’t have the logo.**
Tools:
- Kids Clay Extruder (I used the one in the set –having kids comes in handy! BUT, there are plenty on Amazon to choose from.)
- Paint Brush
- Scissors
- Hot Glue Gun & Glue
- Paper Towel
- Tweezers
Instructions:
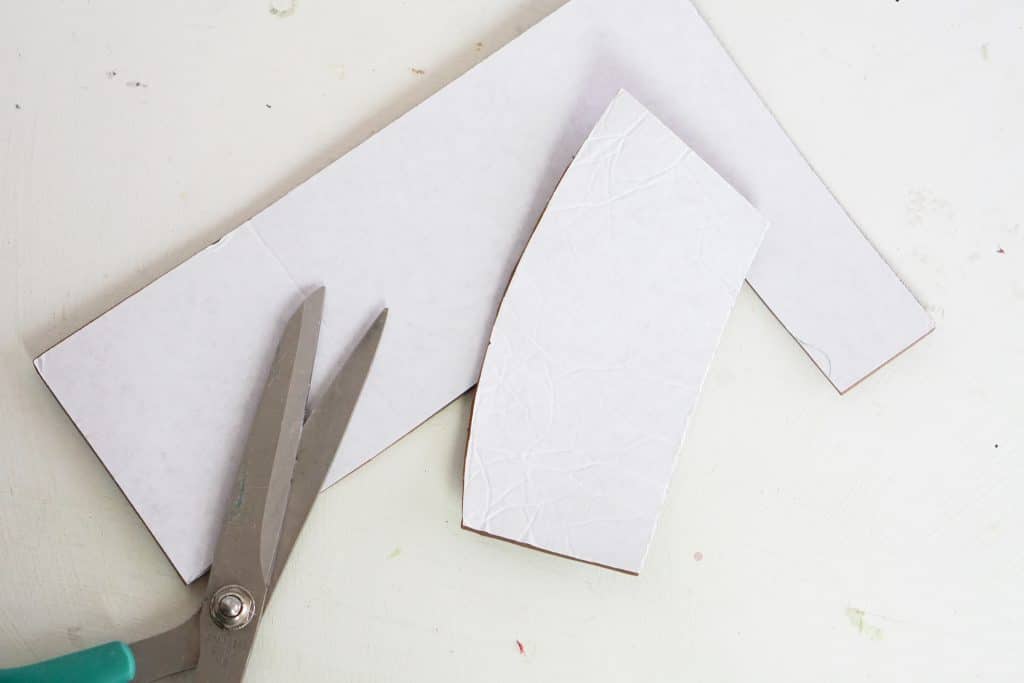
Using the template provided, cut out the rectangle and circle from the brown foam sheet. I used an exacto knife to do this, but you can use scissors–the foam cuts very easily.
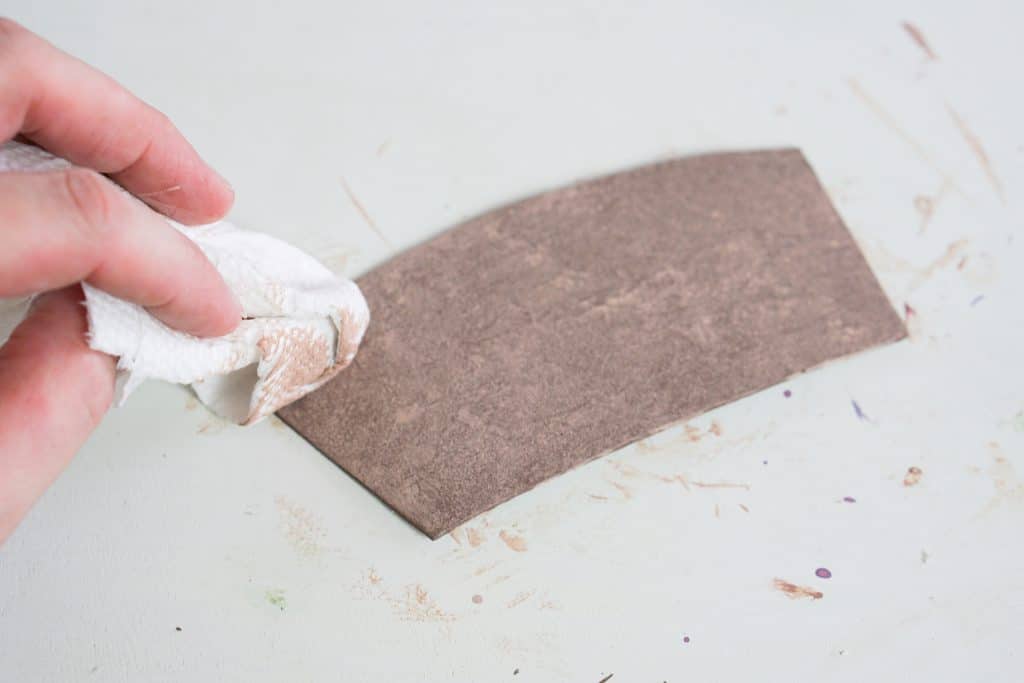
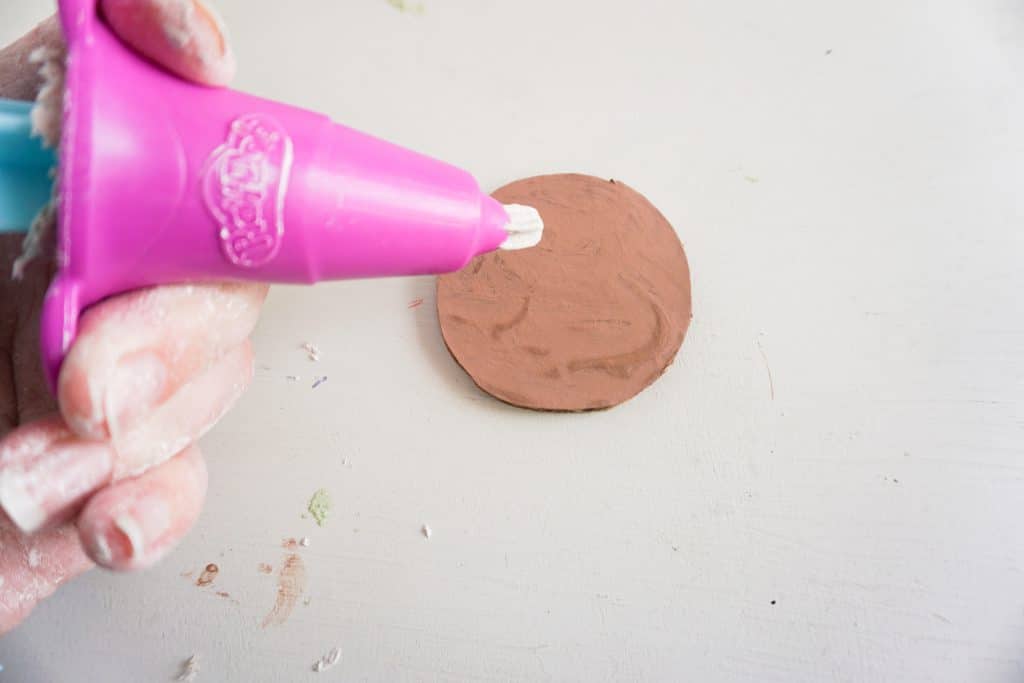
Paint the top of your cardboard circle with a combination of brown and white craft paint to make it look a little like the mocha frap color. Allow paint to dry fully. Using the same combination of brown and white, paint your foam sheet. Dab the paint with the paper towel. You want some paint on the foam sheet, but most of it gone, so it looks flecked. Allow paint to dry fully.
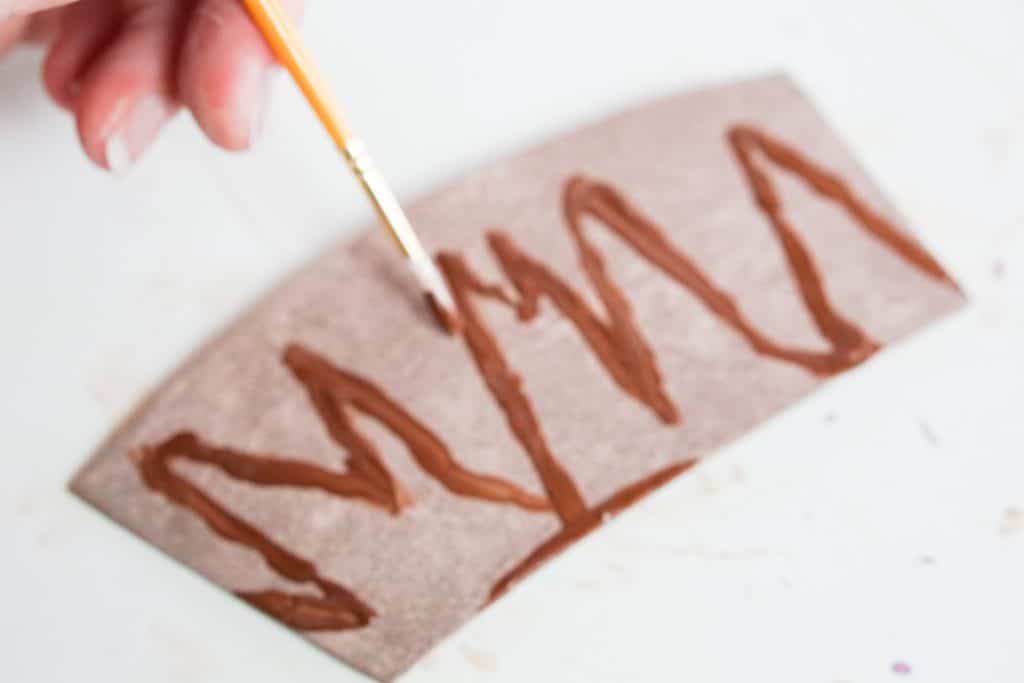
Using undiluted brown paint, draw a jagged “M” all the way across the foam rectangle, like drizzled chocolate. You can even paint an area where it “pools” at the bottom. Allow paint to dry fully.
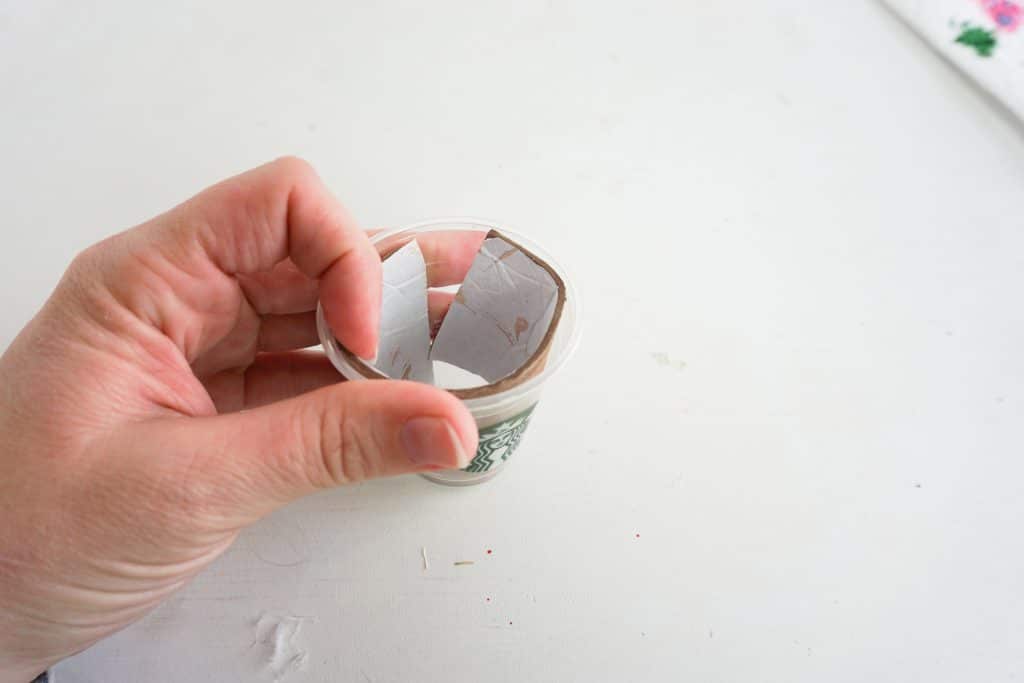
Trim the cardboard circle to fit inside your cup about ½ inch deep. Take care to trim the bottom (unpainted side) a bit more than the top side, this will help it fit into the cup better.
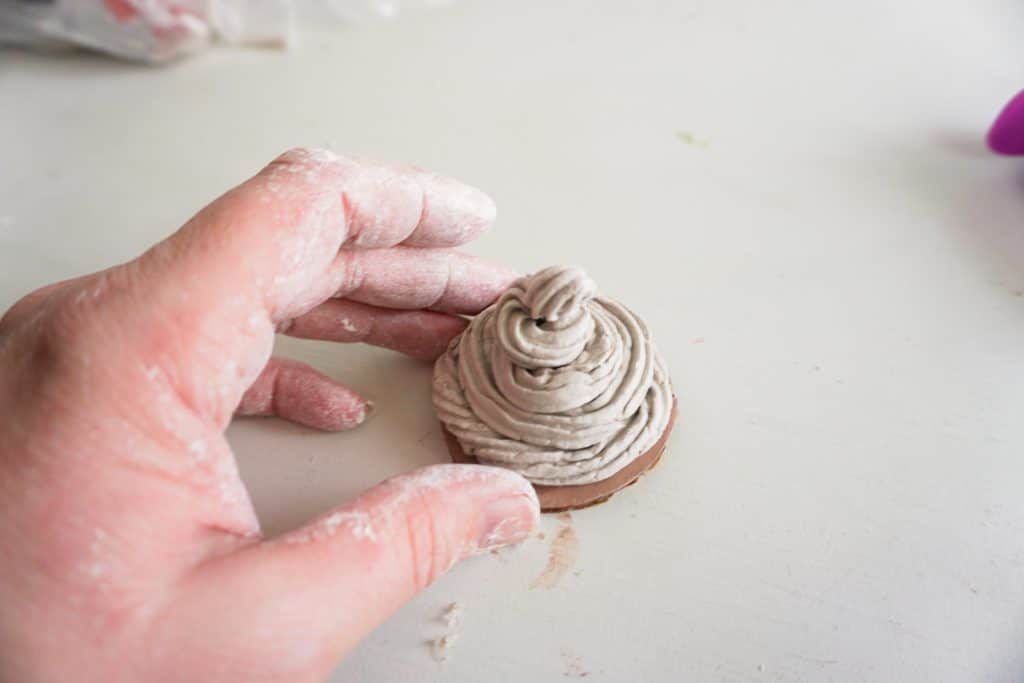
Press some clay into the extruder and extrude out a swirl of clay to sit on top of the cardboard like the whipped cream you want. I practiced a few times and also found that adding a little water to the clay helped it squeeze out of the extruder a little more smoothly. Allow clay to dry for at least 24 hours.
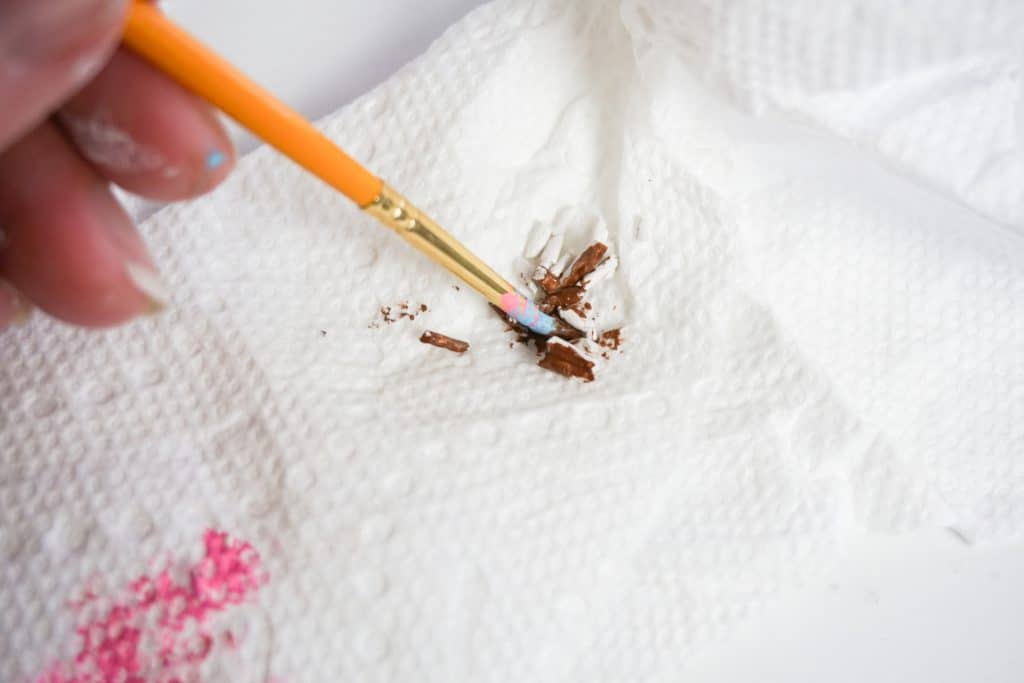
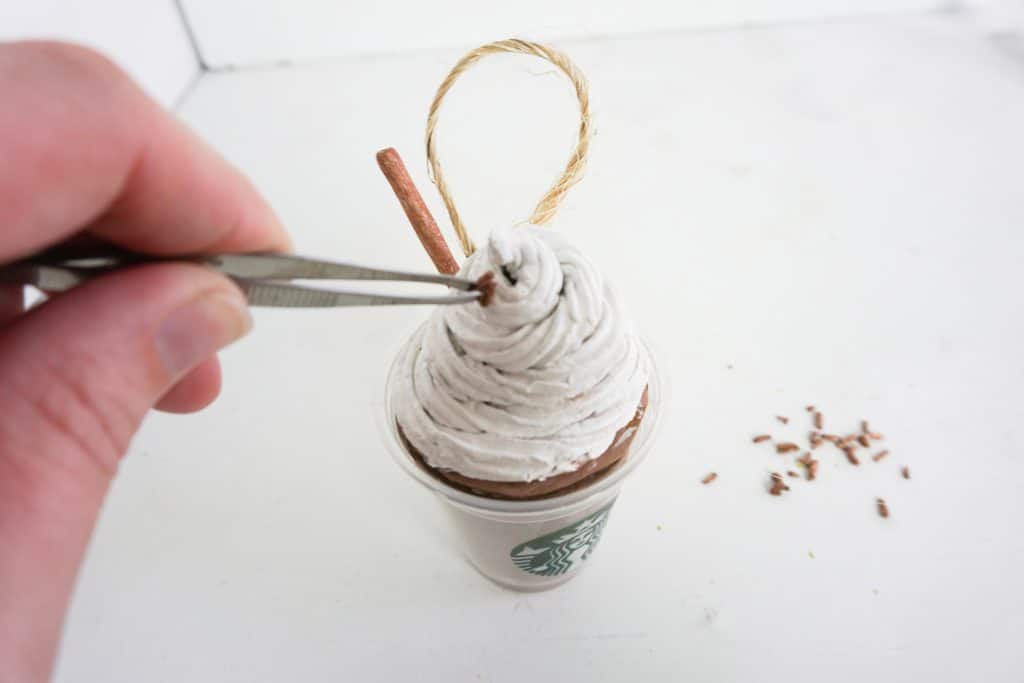
Make a straw by forming a small, thin snake that you lay very very straight to dry overnight. Make a handful of very *very* thin snakes from the clay and allow them to dry overnight. Once dry, break the tiny thin snakes into about 25-30 itty bitty sections. These will become the sprinkles. Paint the sprinkles and straw a dark brown. Allow paint to dry fully.
Paint the whipped cream swirl white. Allow paint to dry fully.
Tuck the foam rectangle into the cup, with the chocolate drizzle showing though. If the foam doesn’t fit perfectly, trim it so it fits properly. Hot glue this in place with the tiniest dab on the back side.
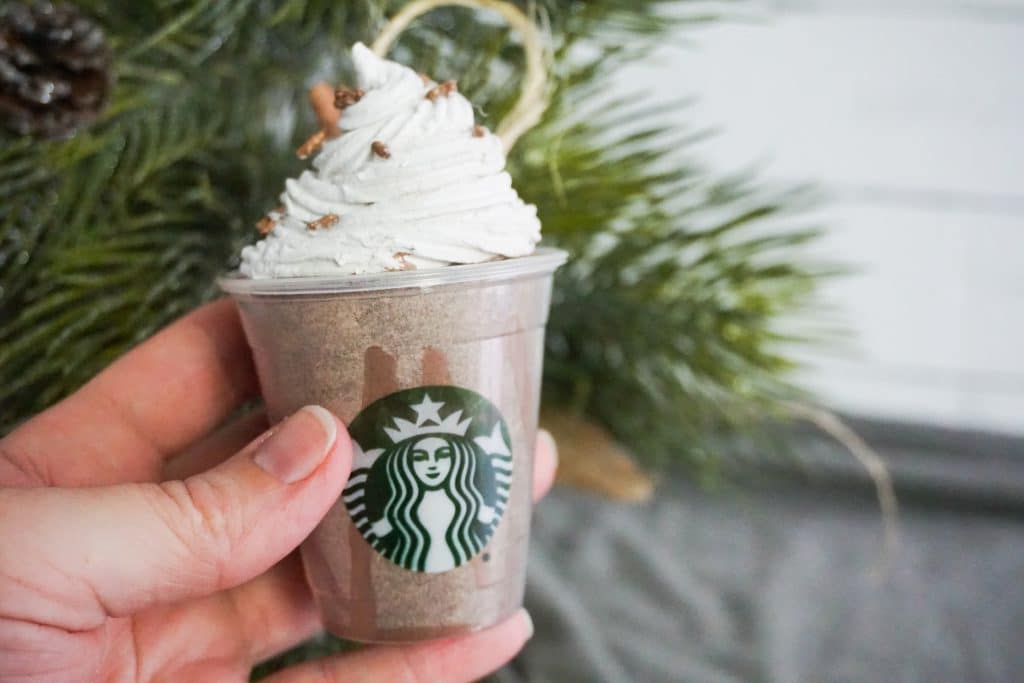
Cut a 3-4 inch length of twine and make a loop, then hot glue this in place on the back side of the cup. Push the cardboard circle into the top of the cup, working it into the foam and making them look like one unit. Hot glue this in place with the tiniest amount of hot glue, if possible. Hot glue the whipped cream on top of the cardboard. Break the straw into the length you desire and hot glue it in place next to the whipped cream.

Using tweezers (if you need them), hot glue the sprinkles on top of the whipped cream.
Enjoy! (On the tree, of course–I shouldn’t have to say this isn’t edible but you know how it goes!)
Ornaments are my favorite! Check out my Christmas Window Felt Ornament!
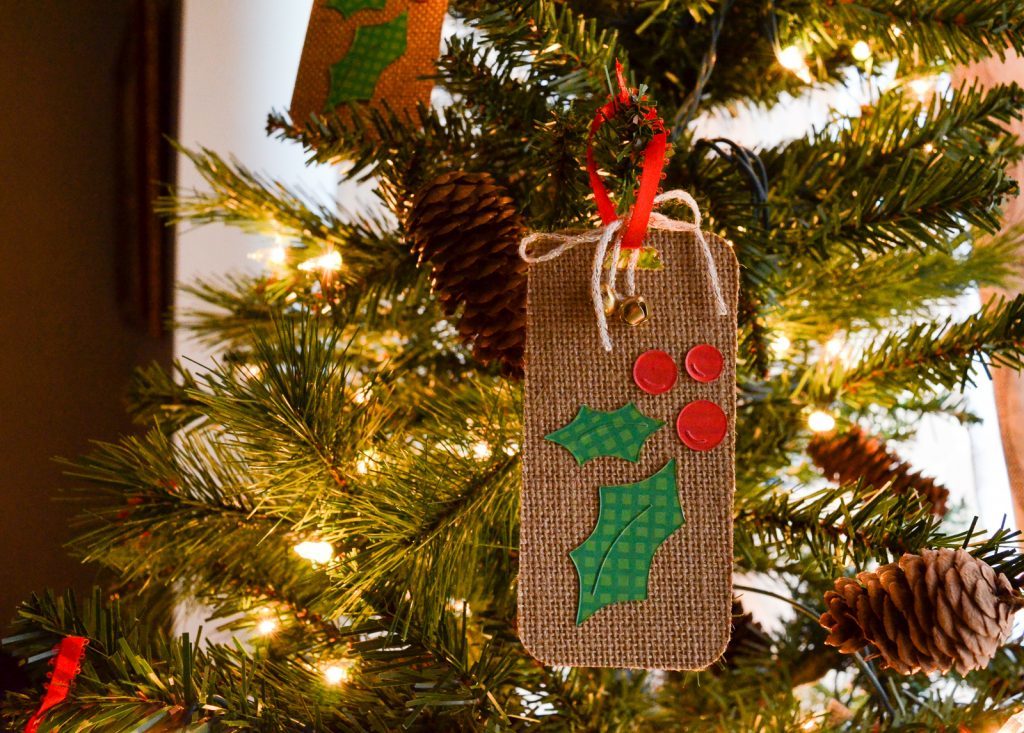
And here are some easy Burlap and Holly Gift Tags that double as fun ornaments!


Love it! One of my favorite drinks!