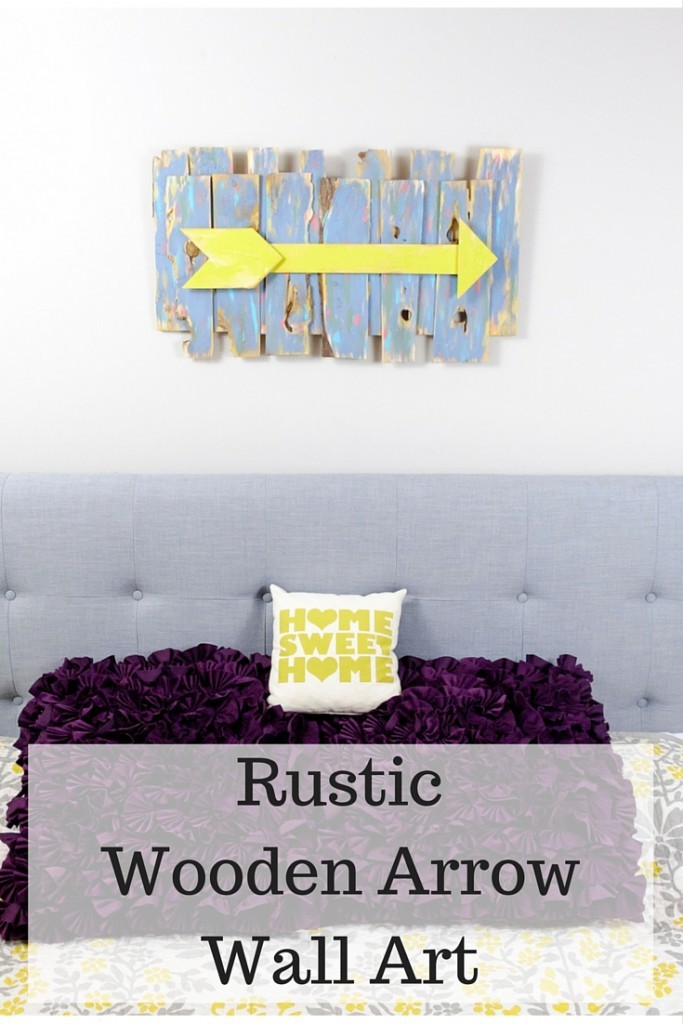
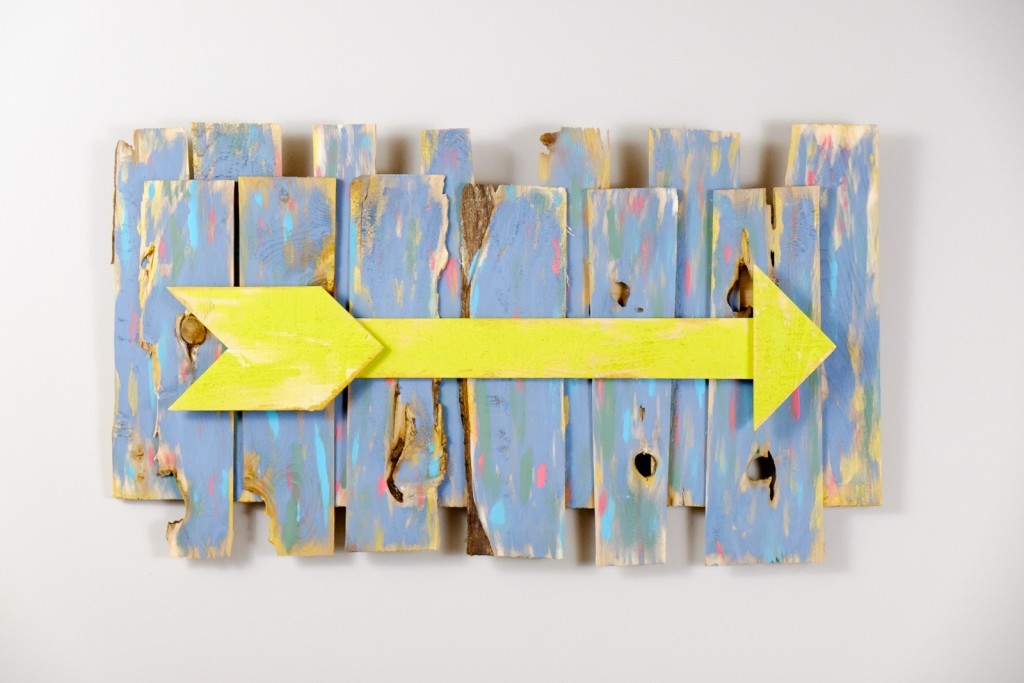
Rustic Wooden Arrow Wall Art
I am beyond excited to announce that I am a DecoArt Core Blogger for 2016-2017. You guys know how much I love their products and I am really looking forward to many fun new projects with them this year! I got to play with some of the new colors in their Americana Acrylic Paint line and created a fun Rustic Wooden Arrow Wall Art piece that is easy to make and and will give you an awesome piece of decor in just a few hours.
This post contains sponsored content. I am a DecoArt Core Blogger.
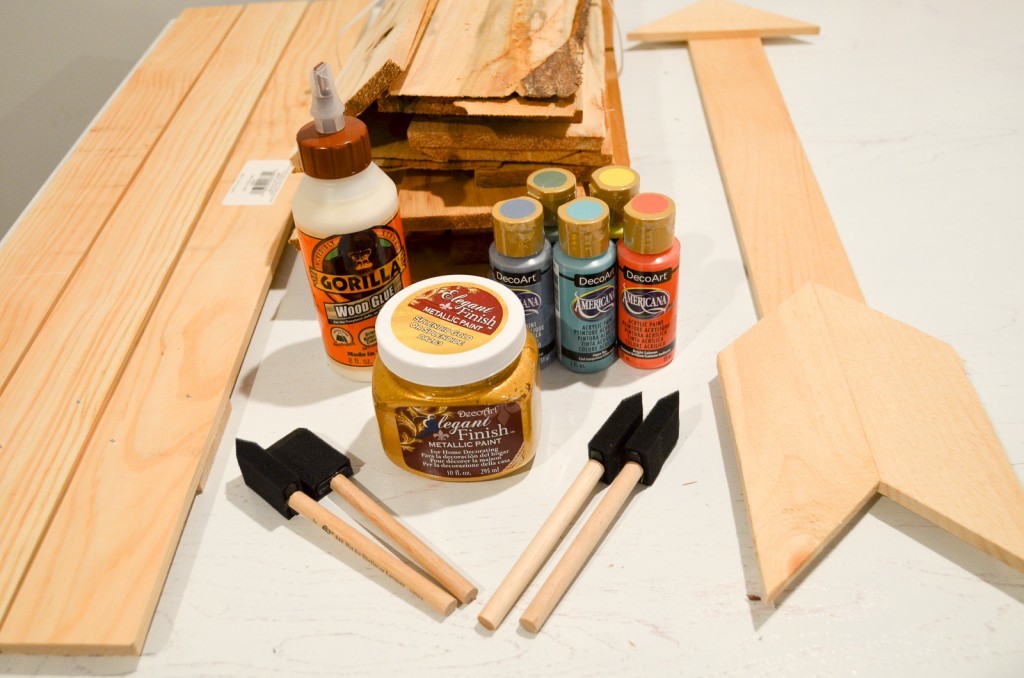
I used:
- rustic arrow
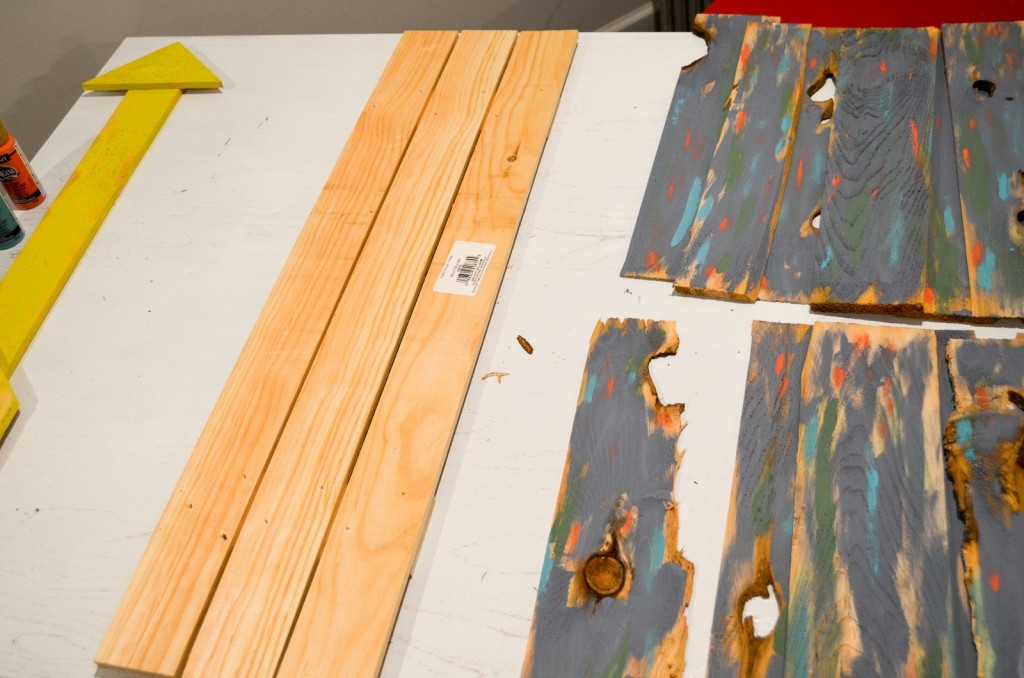
- three plank wood pallet
- pack of shims (found in the wood section of Home Depot)
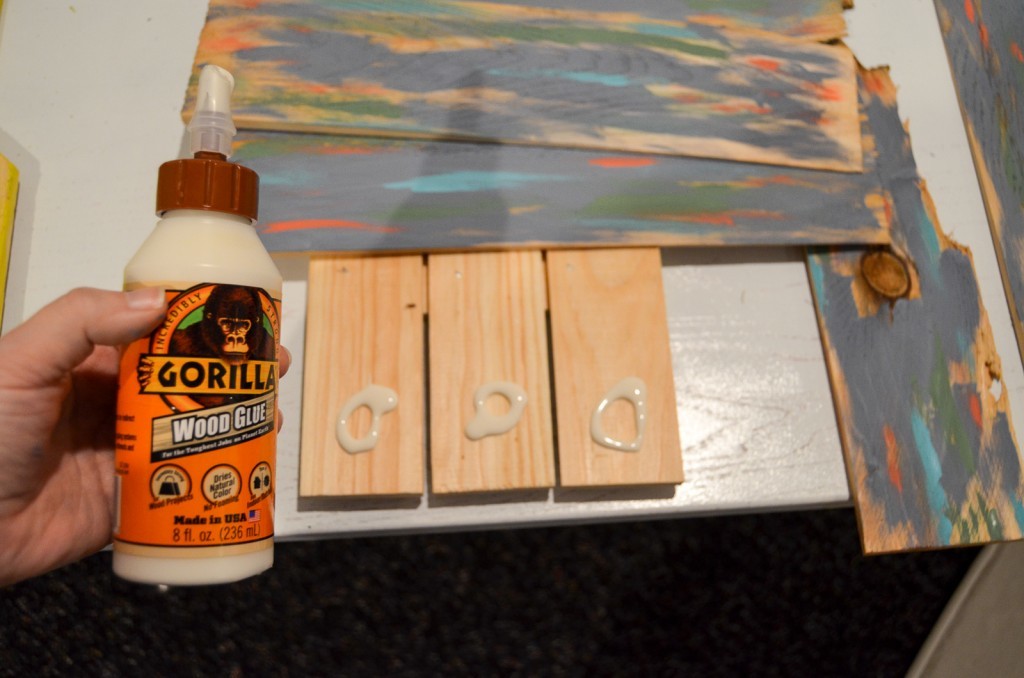
- wood glue
- DecoArt Americana Acrylic Paint in Colonial Blue, Bright Salmon, Chartreuse Yellow, Aqua Sky, and Desert Cactus
- DecoArt Metallic Paint in Gold
- foam brushes
- picture hanging wire and screw eyes

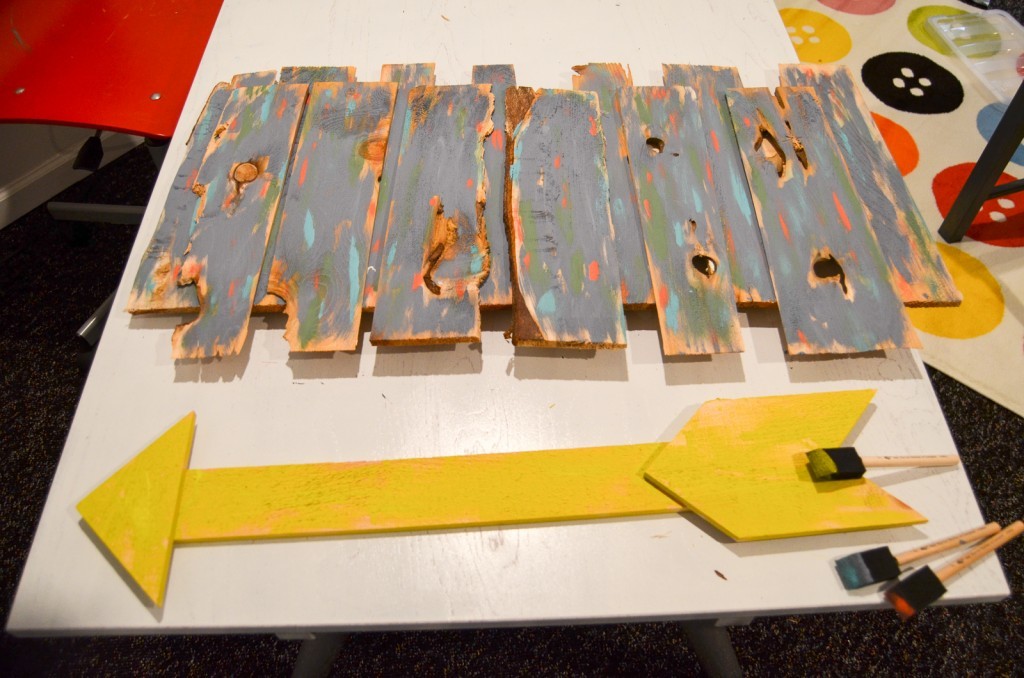
I began by painting the arrow Chartreuse Yellow. I didn’t want full coverage–I wanted the rustic look. A few quick brush strokes and it just needed to dry.

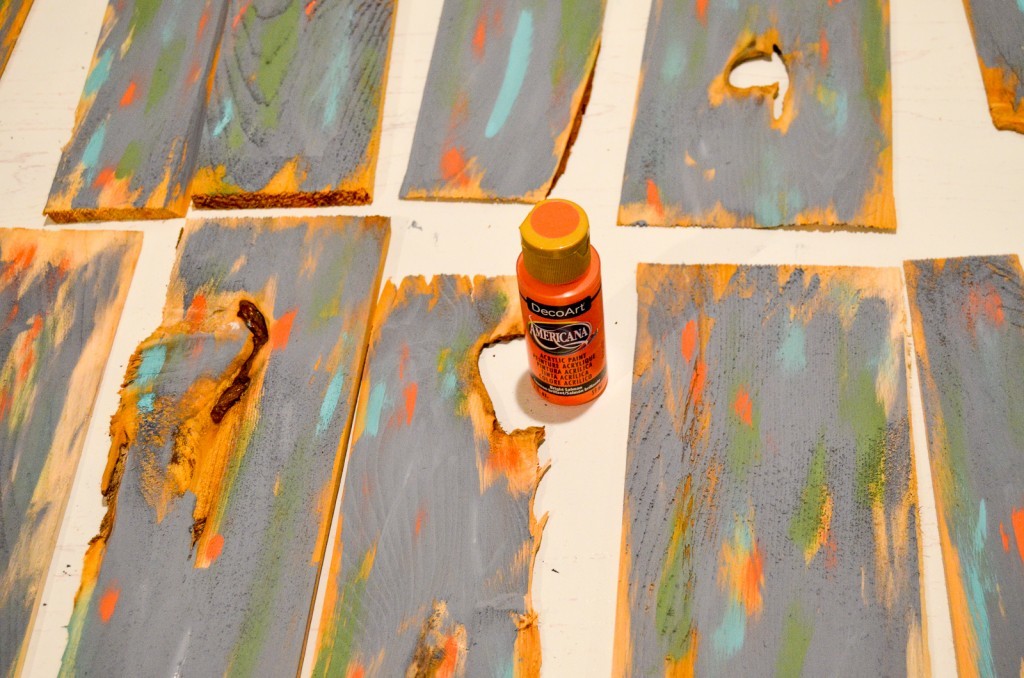
I laid out all of the shims on my table and started painting them in the Colonial Blue. I left a lot of wood showing and wanted it to be kind of streaky. I didn’t use a lot of paint on my brush–it was fairly dry painting.
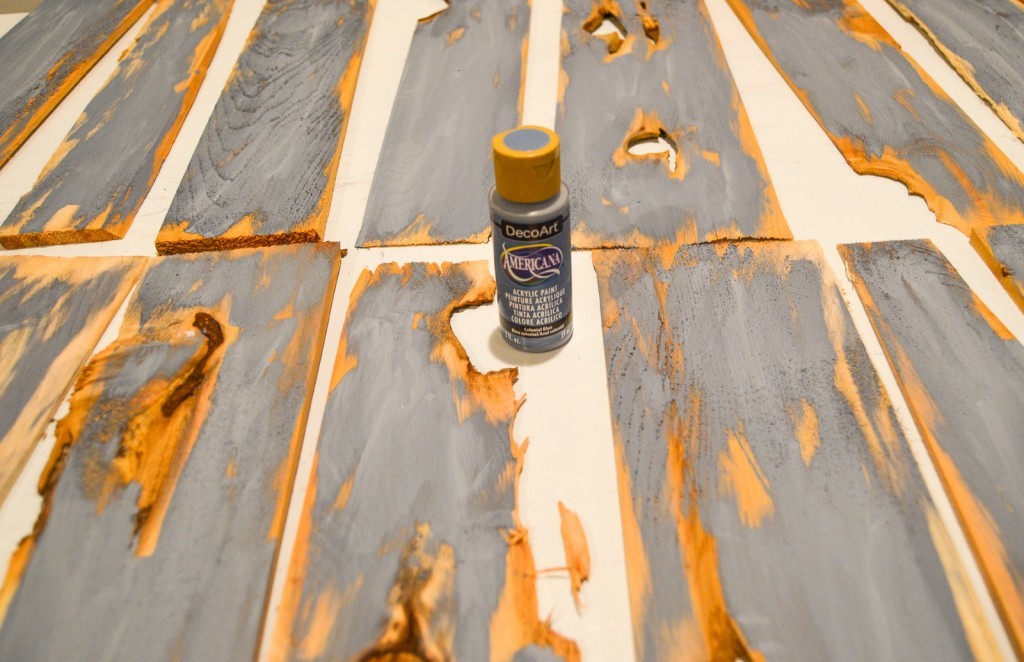
Adding in the Desert Cactus helped create some depth to my shims. You can see that I didn’t use a lot of it, but it’s enough to make it pop.
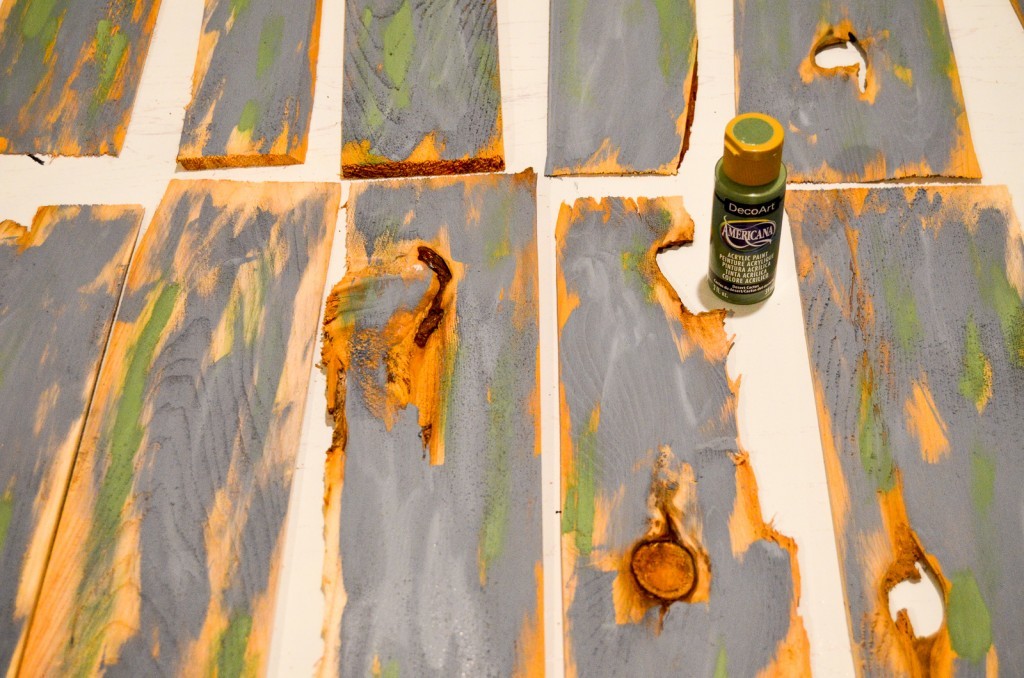
There was even less of the Aqua Sky, but I love that pop. At this point, I was really falling in love with this project!

The final layer was the Bright Salmon. Just a bit here and there and the shims just needed to dry.
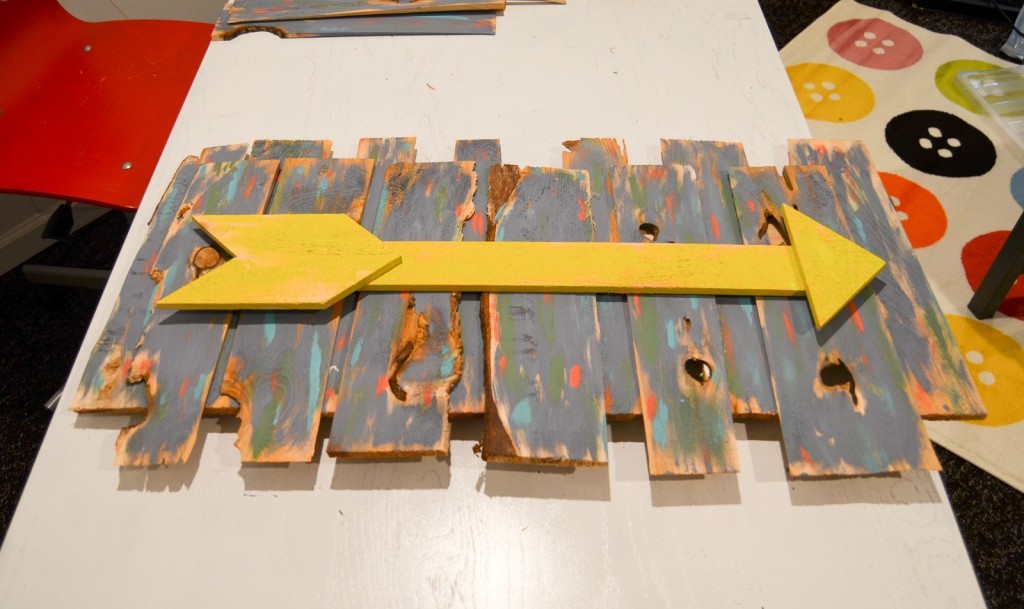
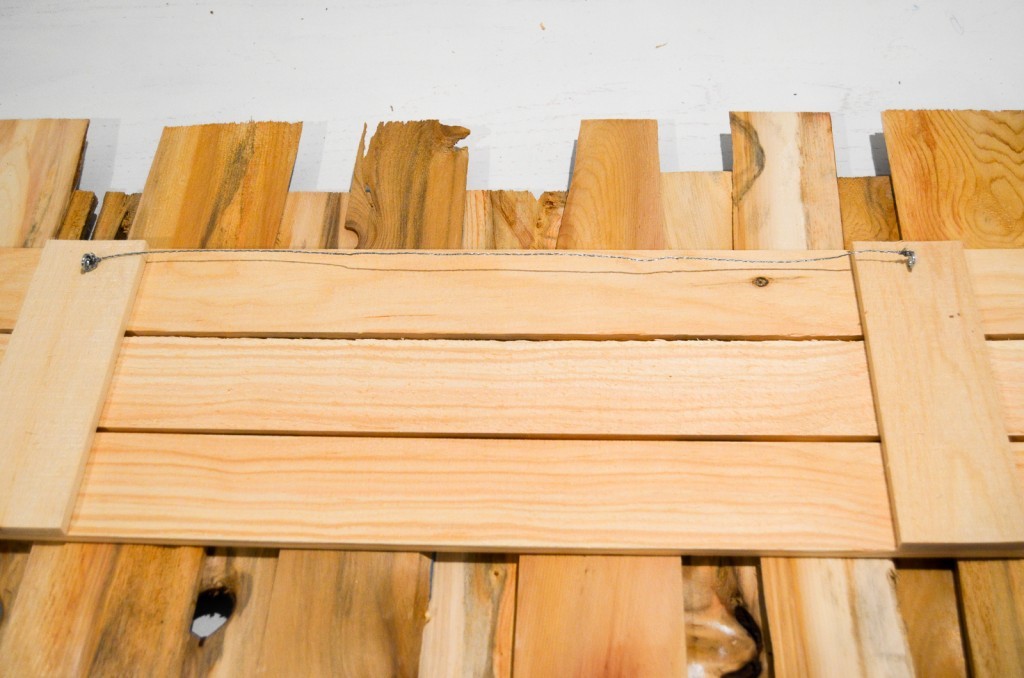
When the shims were dry, I pulled out my pallet and started placing the pieces. When I was happy with the look, I took each piece off, added wood glue, and placed it back on.
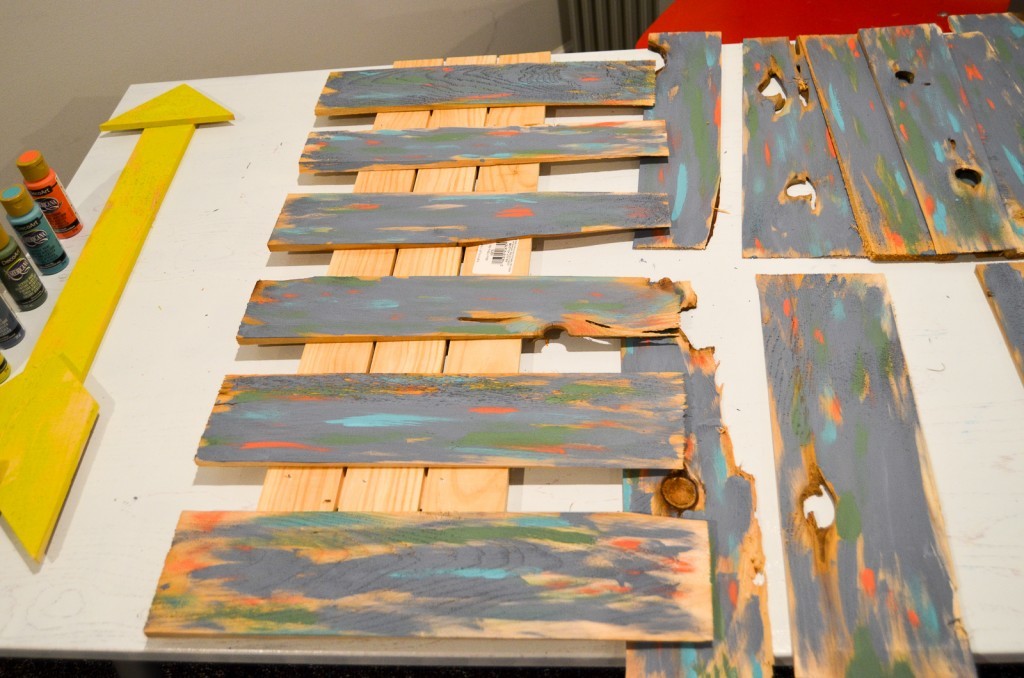
I glued the second layer of shims on so that they were spanning the gaps between the first layer of shims.
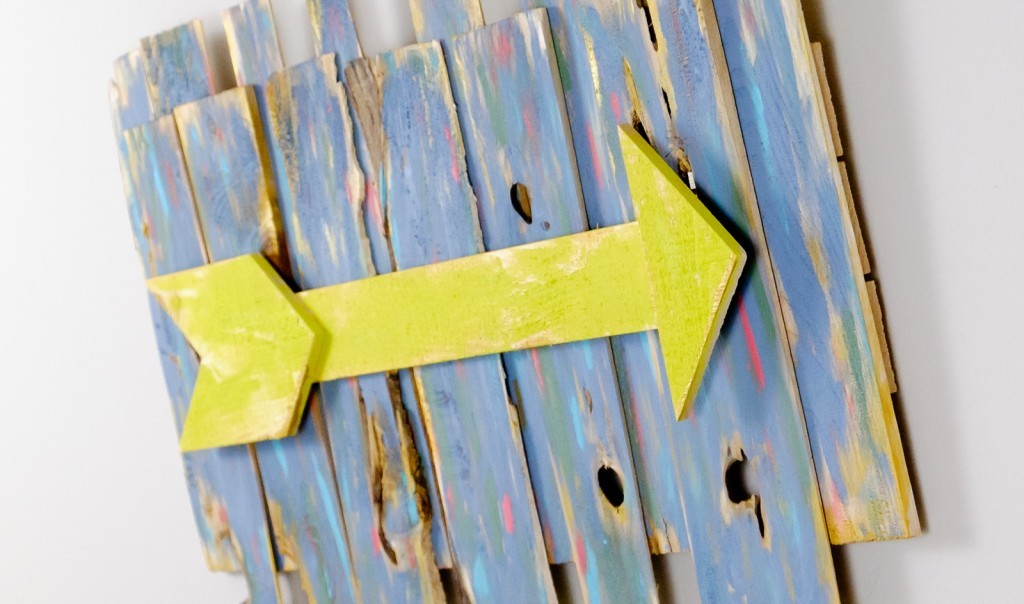
Finally, I glued the arrow on. The longest part of the entire project was waiting for the glue to dry!
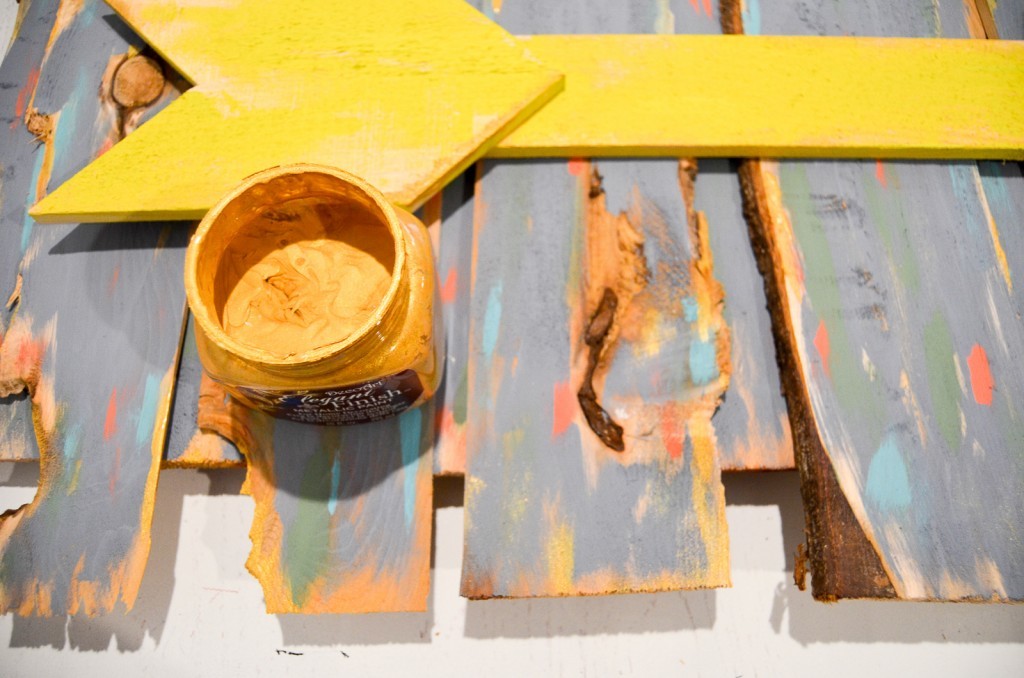
To add just a bit more detail, I put some touches of gold on at the end.
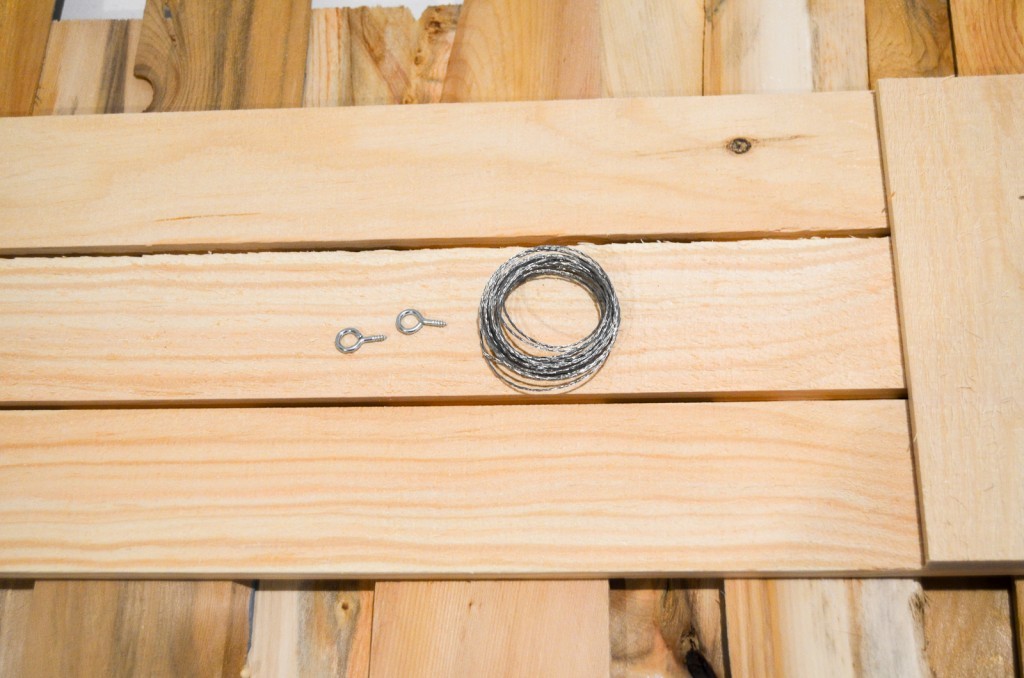
The piece is actually surprisingly light, so I didn’t need anything major to hang it–just standard picture hanging wire and screw eyes. I put a screw on each cross beam of the pallet, attached the wire, and I was finished.
I loved seeing my Rustic Wooden Arrow Wall Art hung up for the first time.

The colors just make me happy and I love the rustic look.
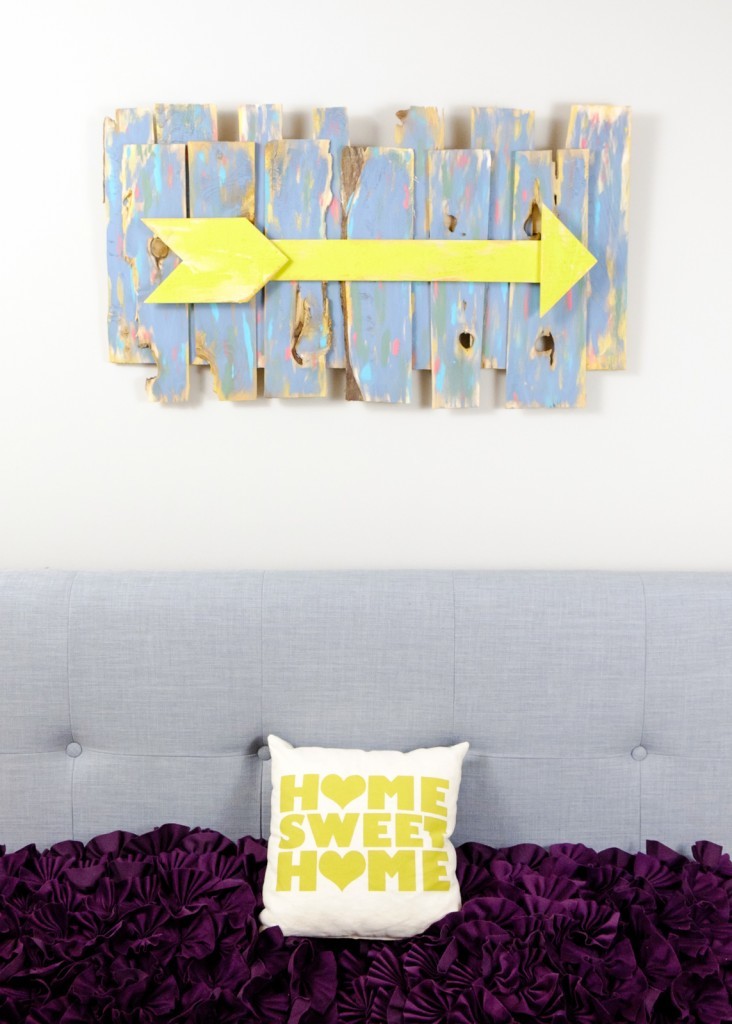
This piece makes me smile every time I look at it. I had so much fun making my Rustic Wooden Arrow Wall Art and playing with DecoArt’s new colors. I’m already looking forward to my next project with them!


This is gorgeous! Thanks for the great tutorial, my house could definitely use one of these darling wall art pieces!
Love the way you individually painted the fence pieces. I never know when to stop though, when I’m adding a dash here and there. Thanks for sharing your creative design and many congrats on being their new blogger
So cute! I love this. And congrats on being a Core Blogger this year!
I love this project Albion! I love how you made a background for the arrows instead of just mounting the arrows flat against the wall. It’s so unique!
It was great meeting you at SNAP and spending a bit of time with you!
I included this project in a roundup of some of my favorite DIY and craft projects from people attending SNAP! I’d love for you to take a peek. You can find it here:
http://hellocreativefamily.com/27-diy-projects-from-creative-snap-bloggers/
Best Wishes,
Crystal